AWS Configuration Guide
© 2026 Sonrai Security. All rights reserved.
Overview
Learn how to add accounts to fully enable Sonrai's cloud monitoring capabilities for your AWS Organization(s).
Pre-Deployment Prerequisites
Required
Review/implement the required prerequisites before progressing onto Account configuration:
Adding Accounts - Onboarding Your AWS Organization
The Cloud Permissions Firewall requires a main Collector role that it can assume to monitor your cloud. This role (and associated trust policy) is created in the AWS Organization management account.
The firewall also leverages a StackSet to manage a Collector role in each of the accounts within your AWS Organization.
How do I onboard an AWS Organization to the Accounts section of the Cloud Permissions Firewall?
In the left-hand navigation menu, click Manage > Accounts
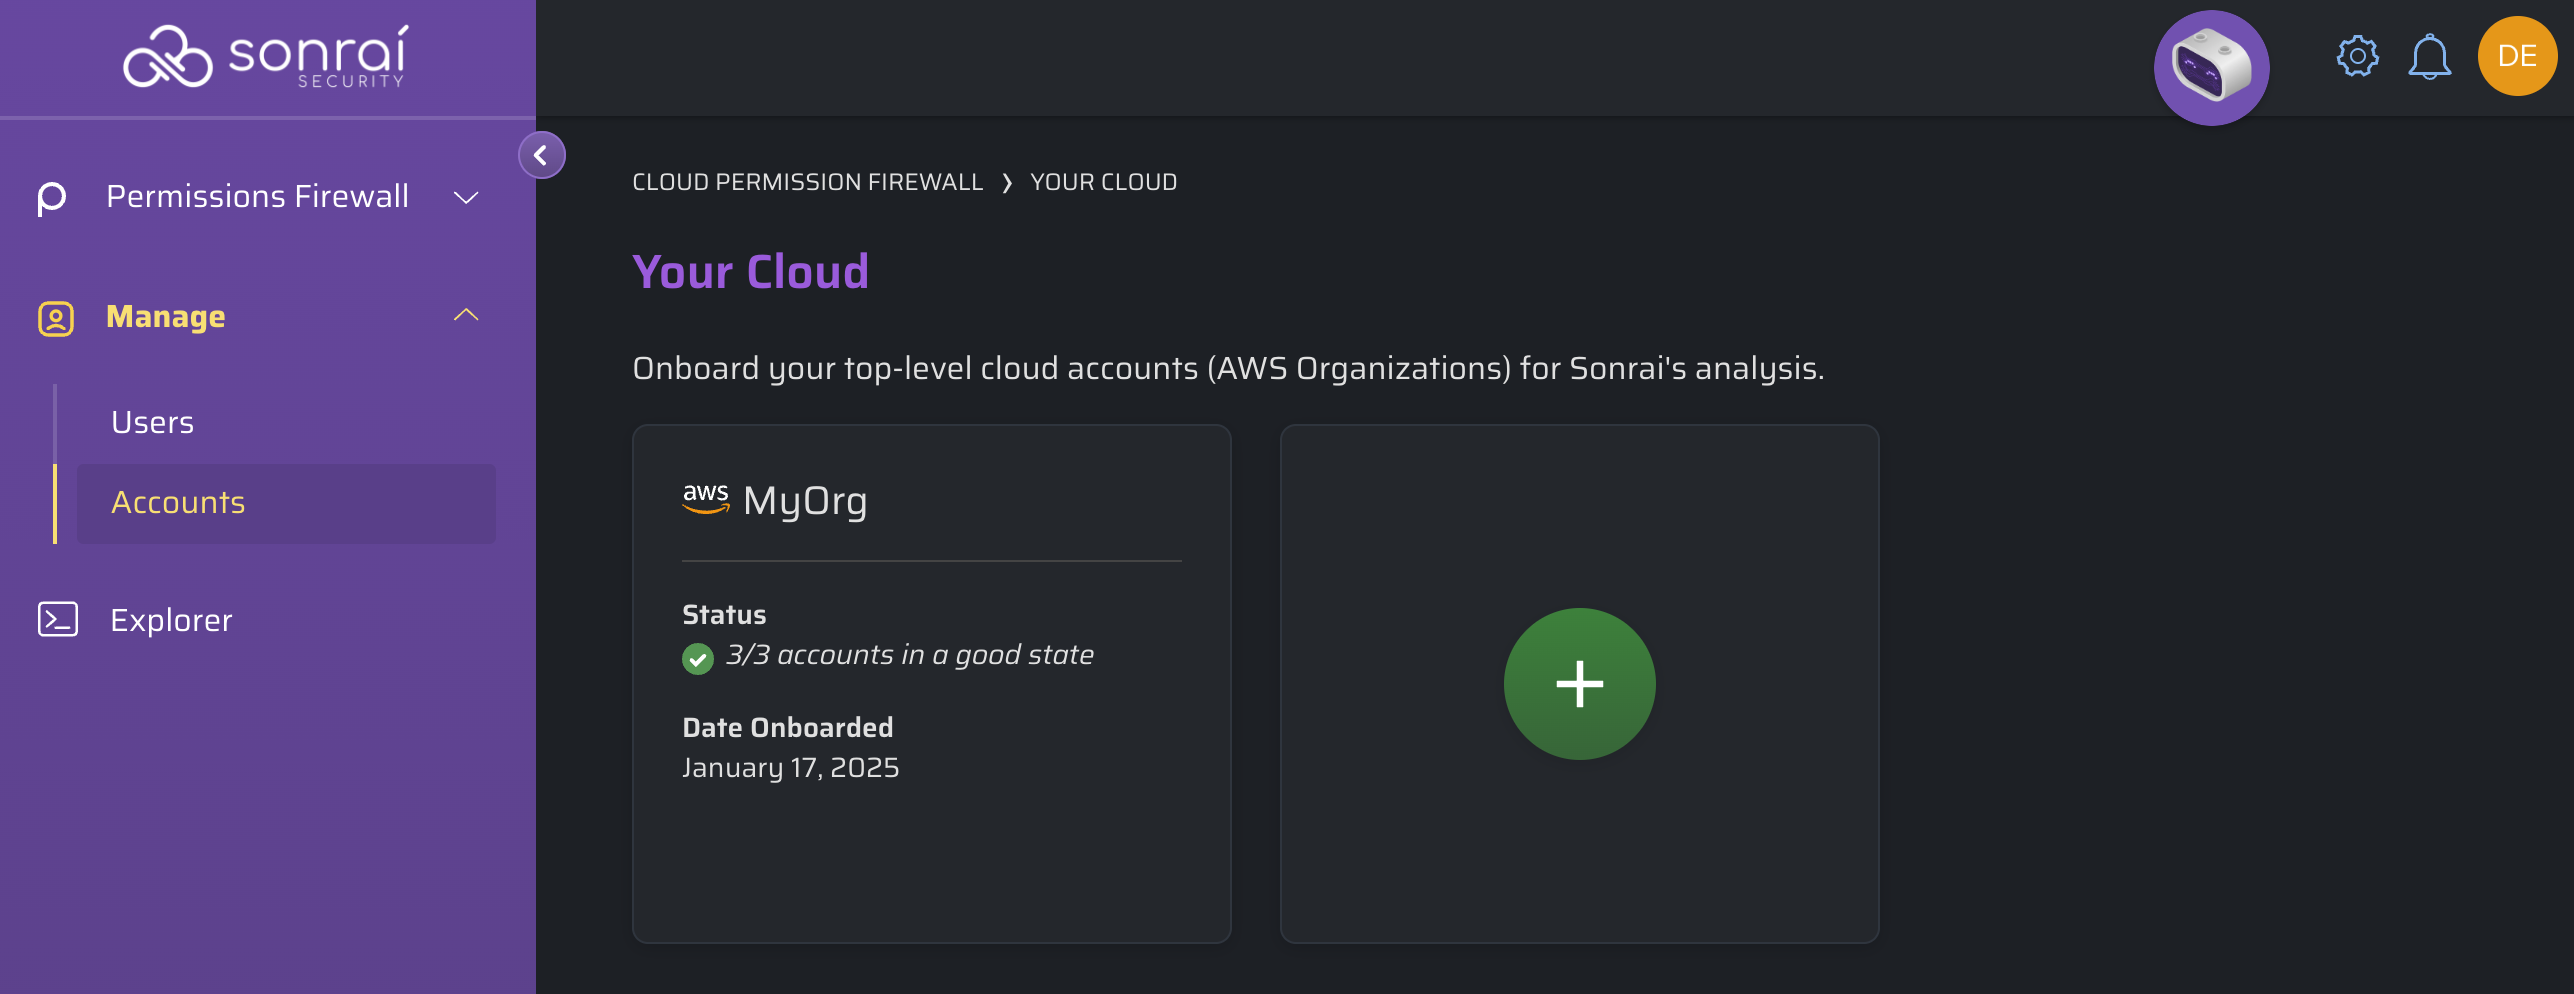
Click to add a new account.
 AWS Organizations
Adding an Organization-level Account conveniently allows for deployment of roles in all Accounts at once.
If you are using a Delegated Admin account, please review this documentation first!
Role name(s) used with the Sonrai Collector(s) are not required to be prefixed with "sonrai-, they can follow any naming convention in use within your organization
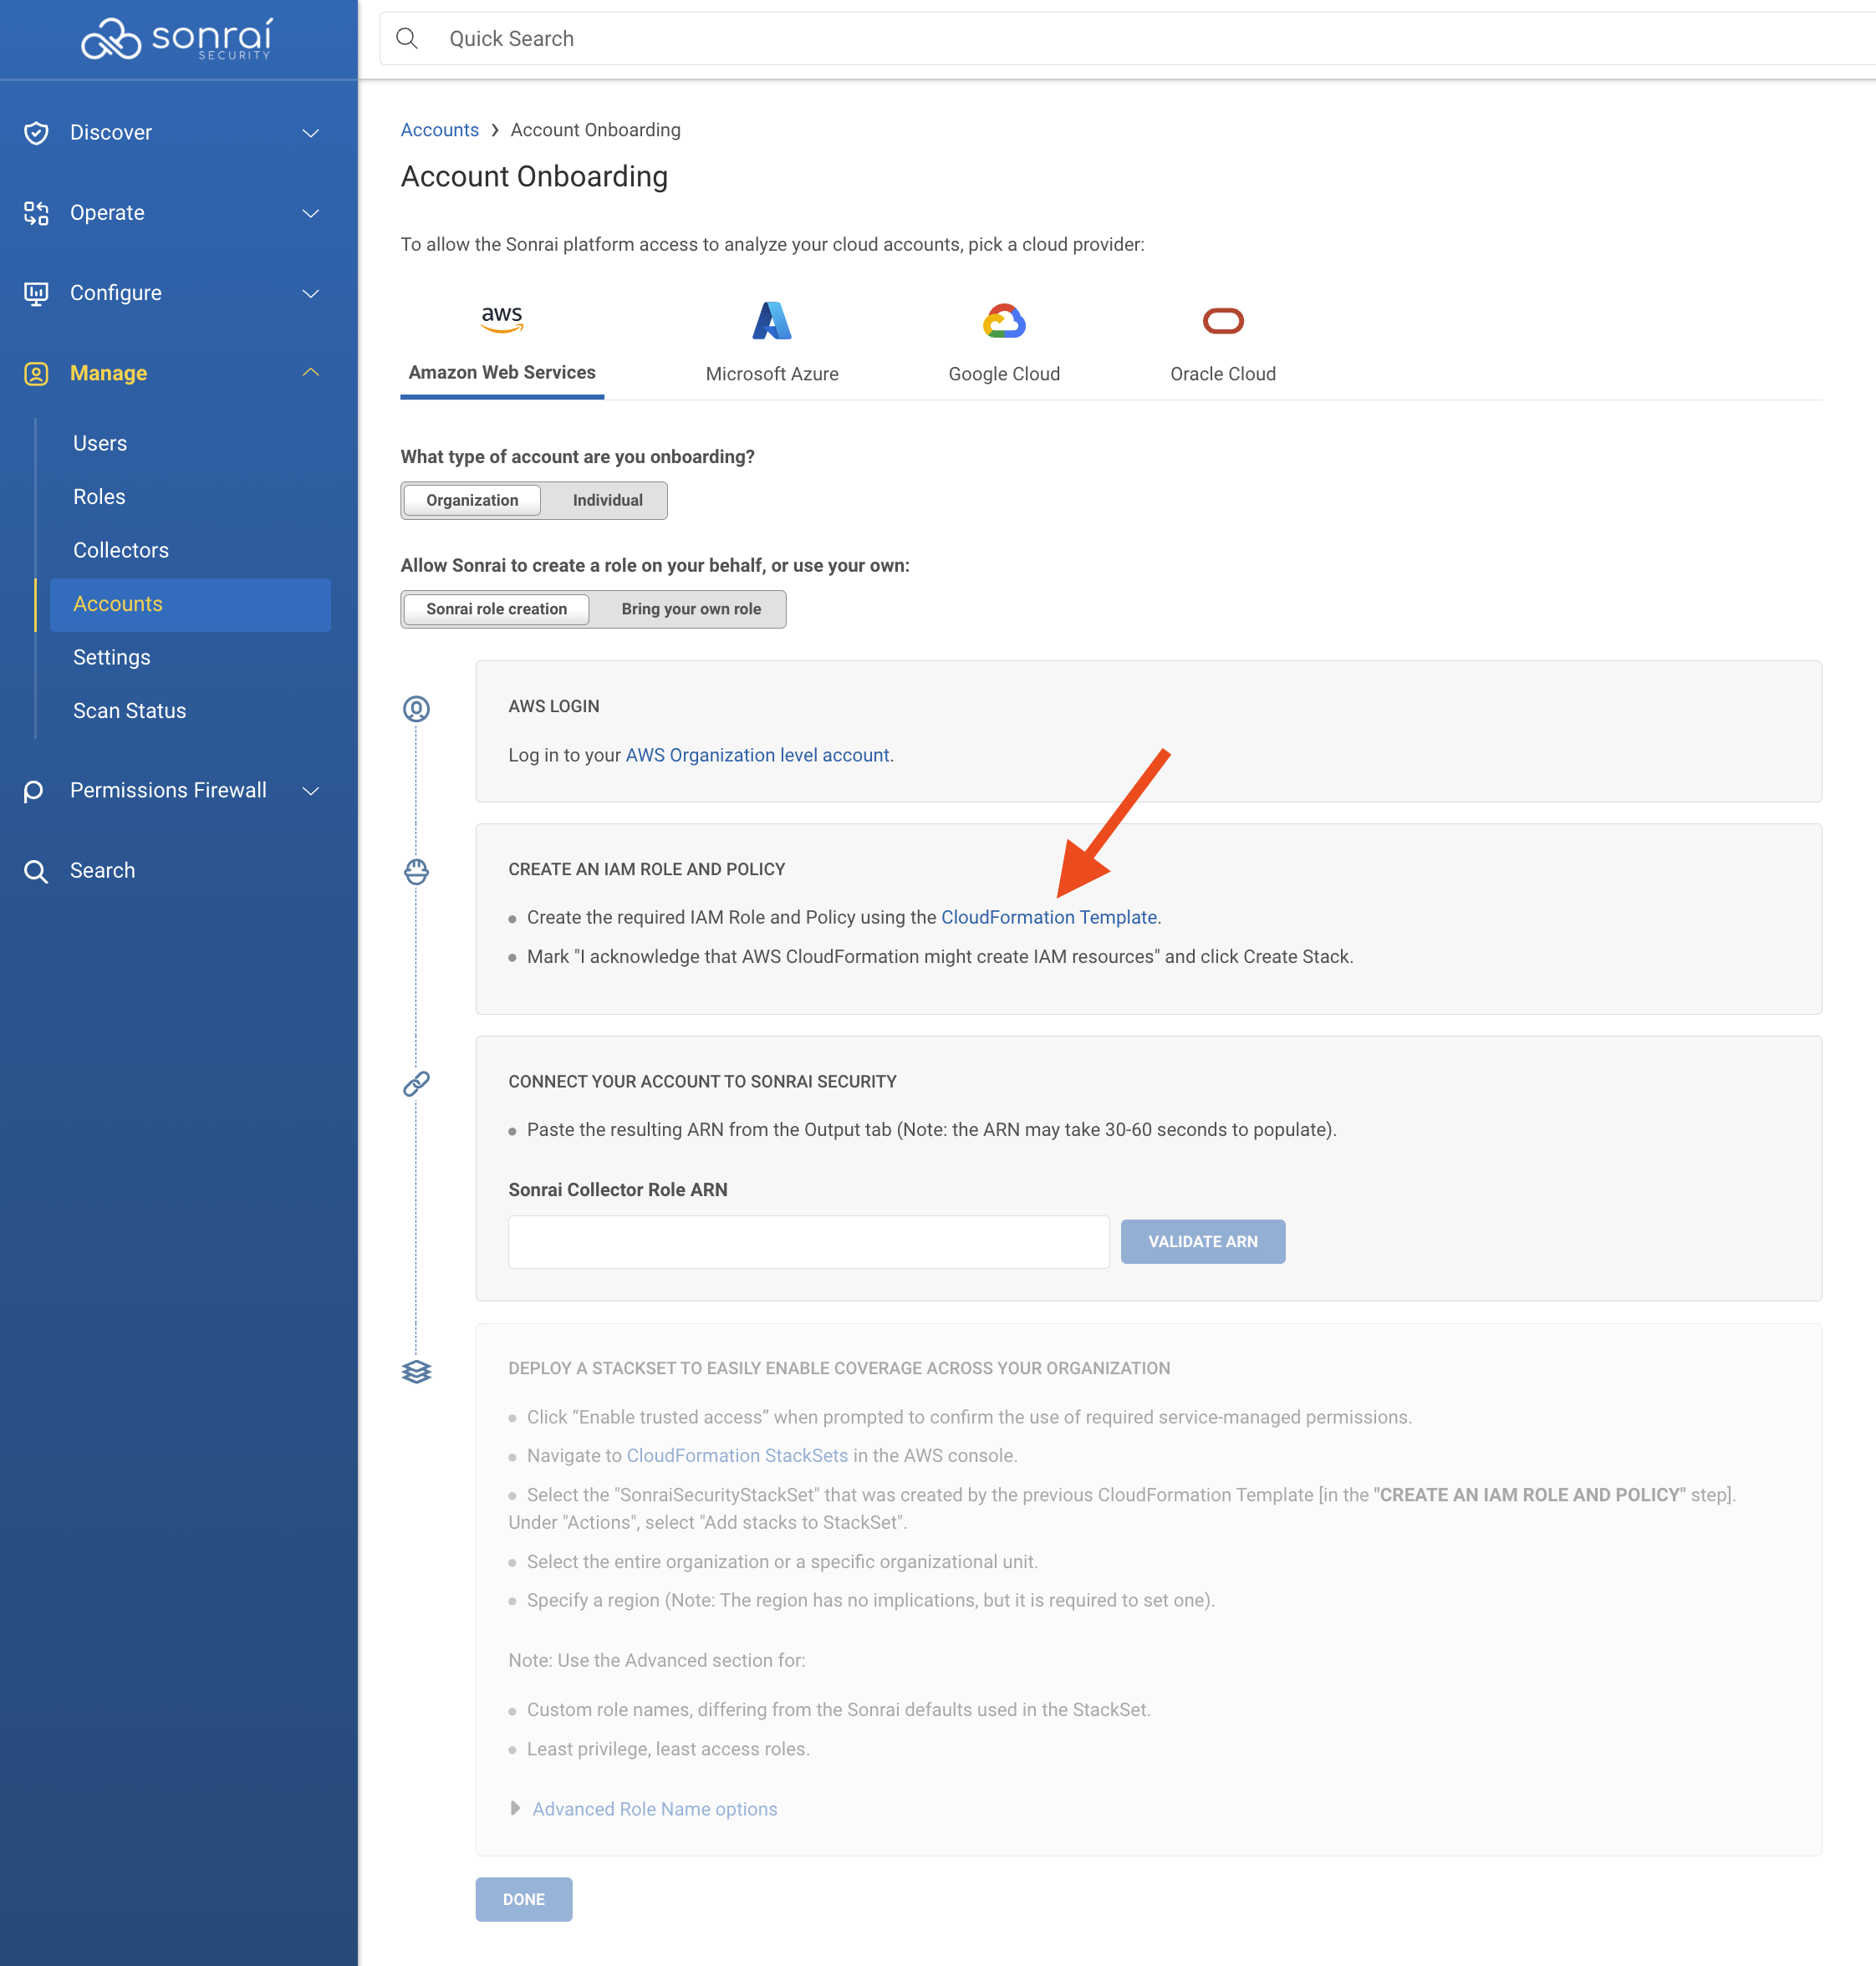
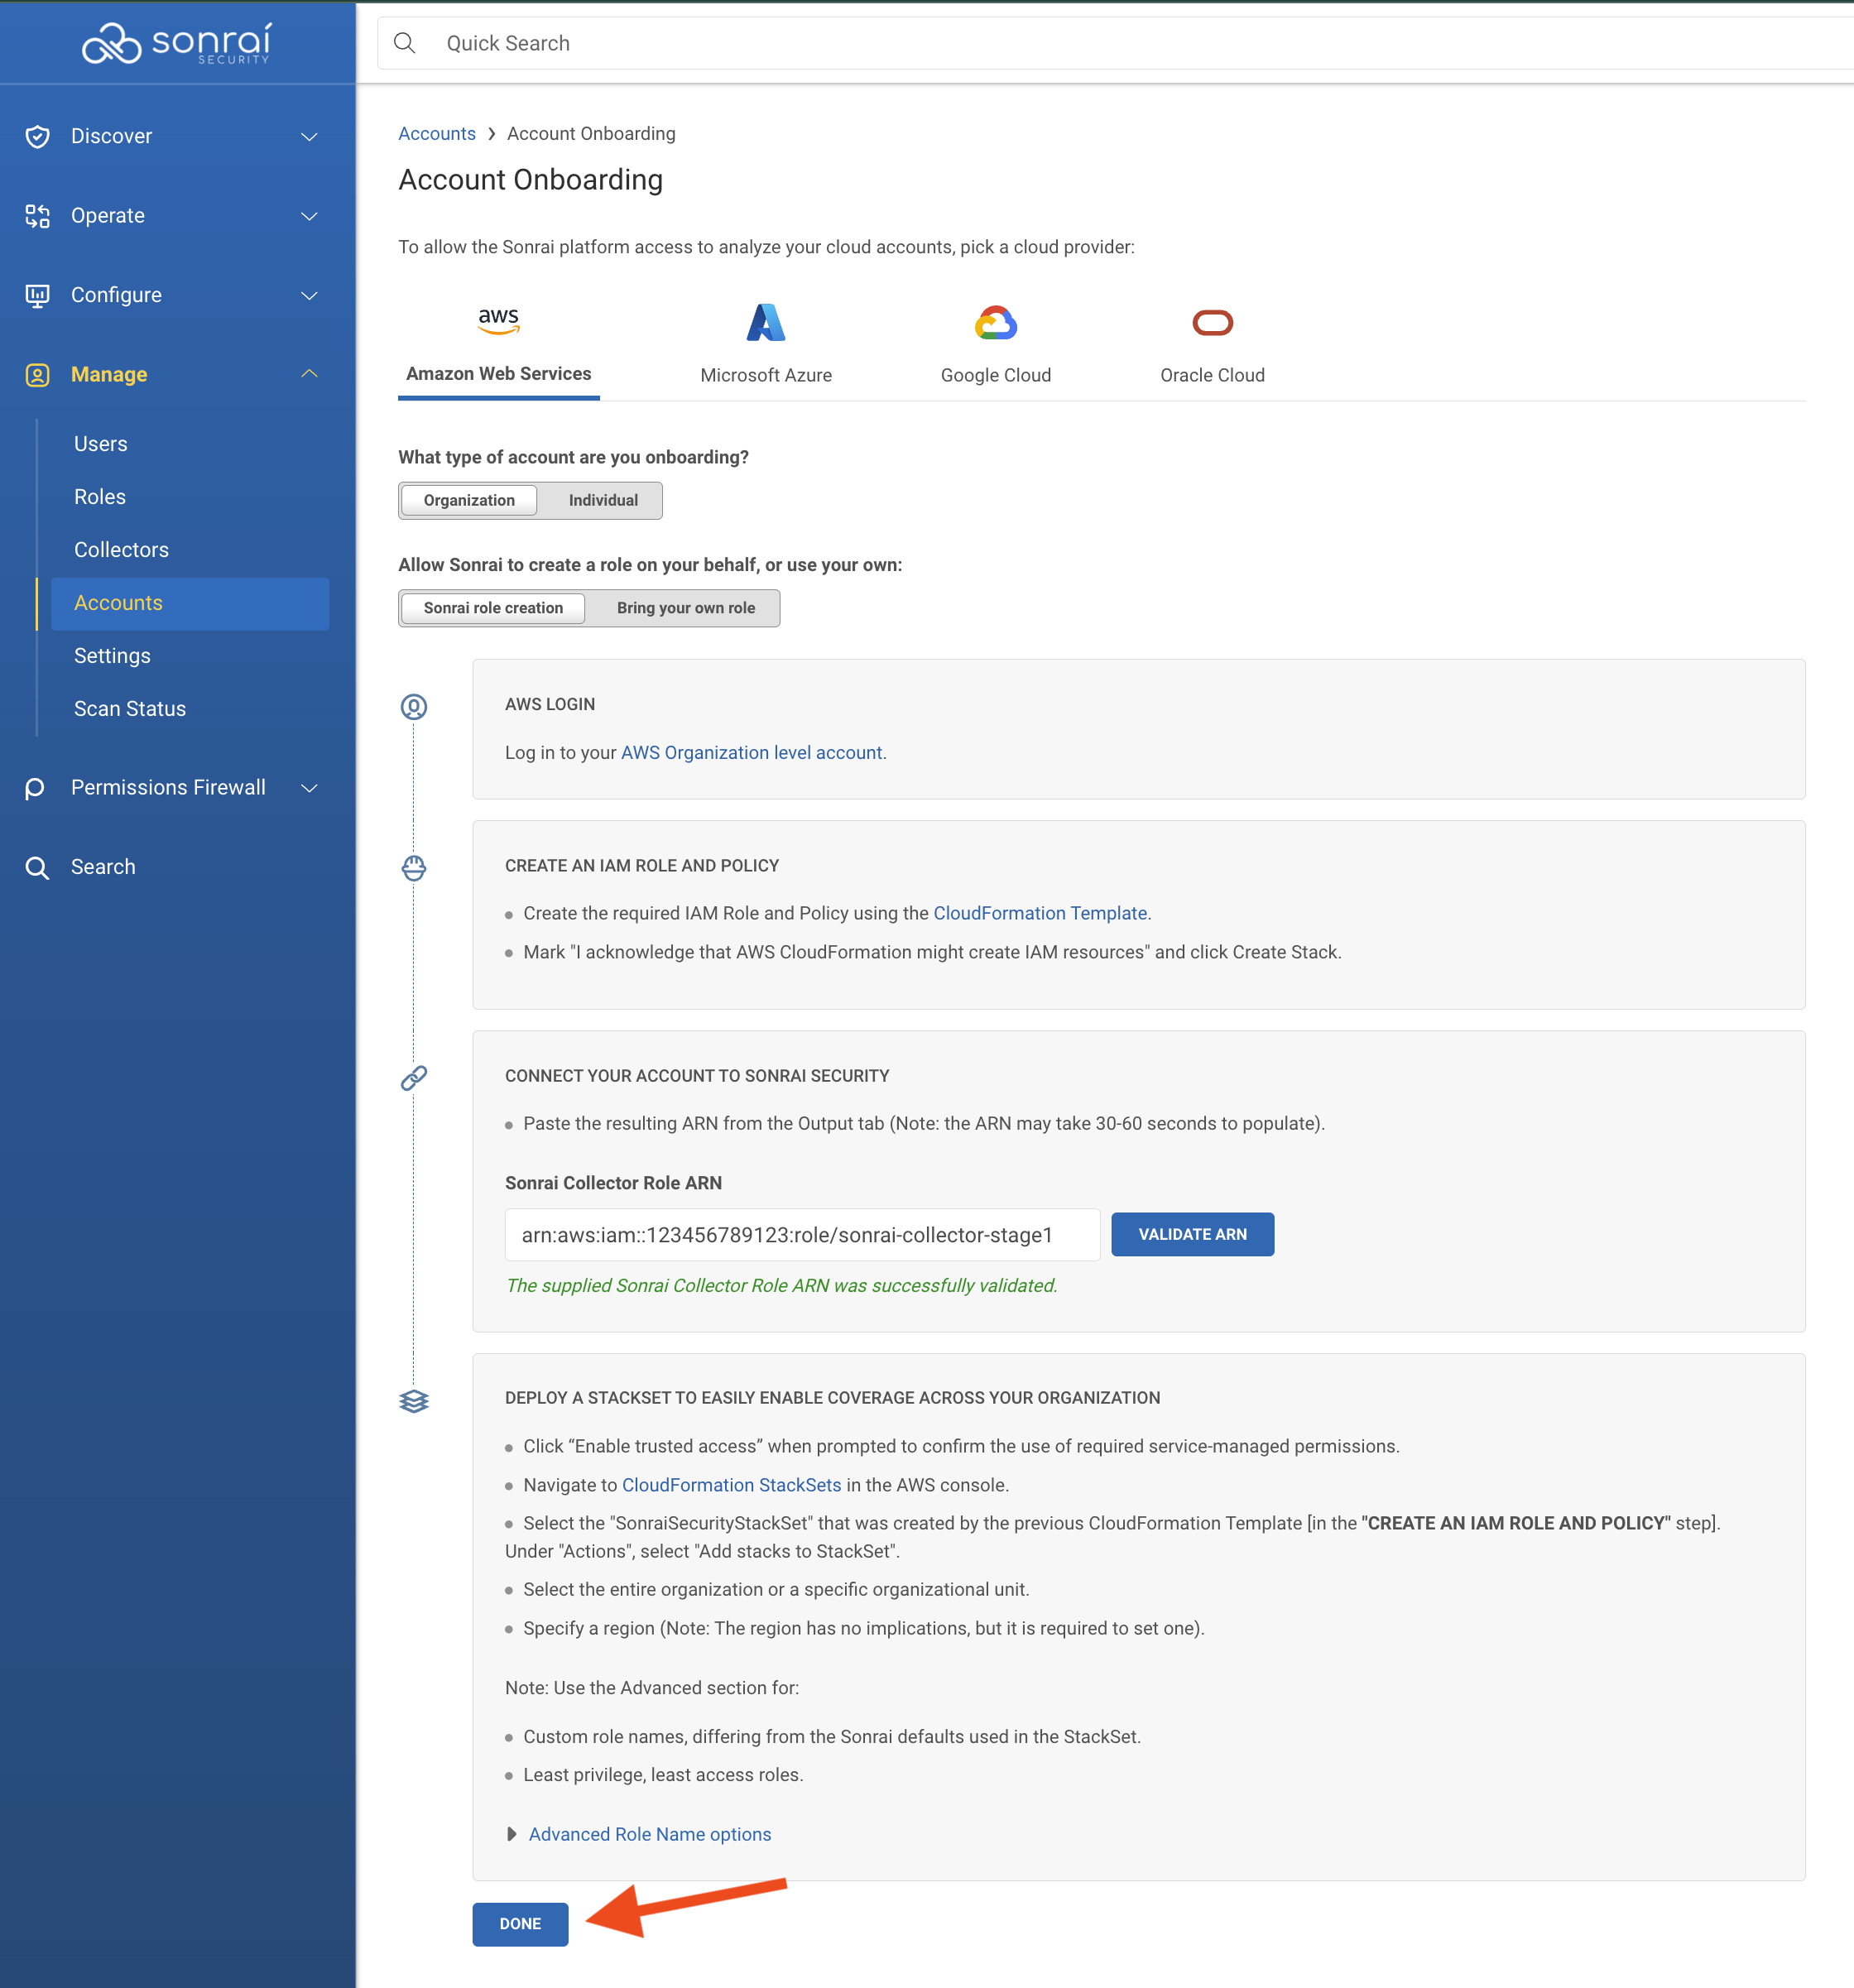
Sonrai Role Creation [Recommended Method]
Log in to your AWS Organization Account
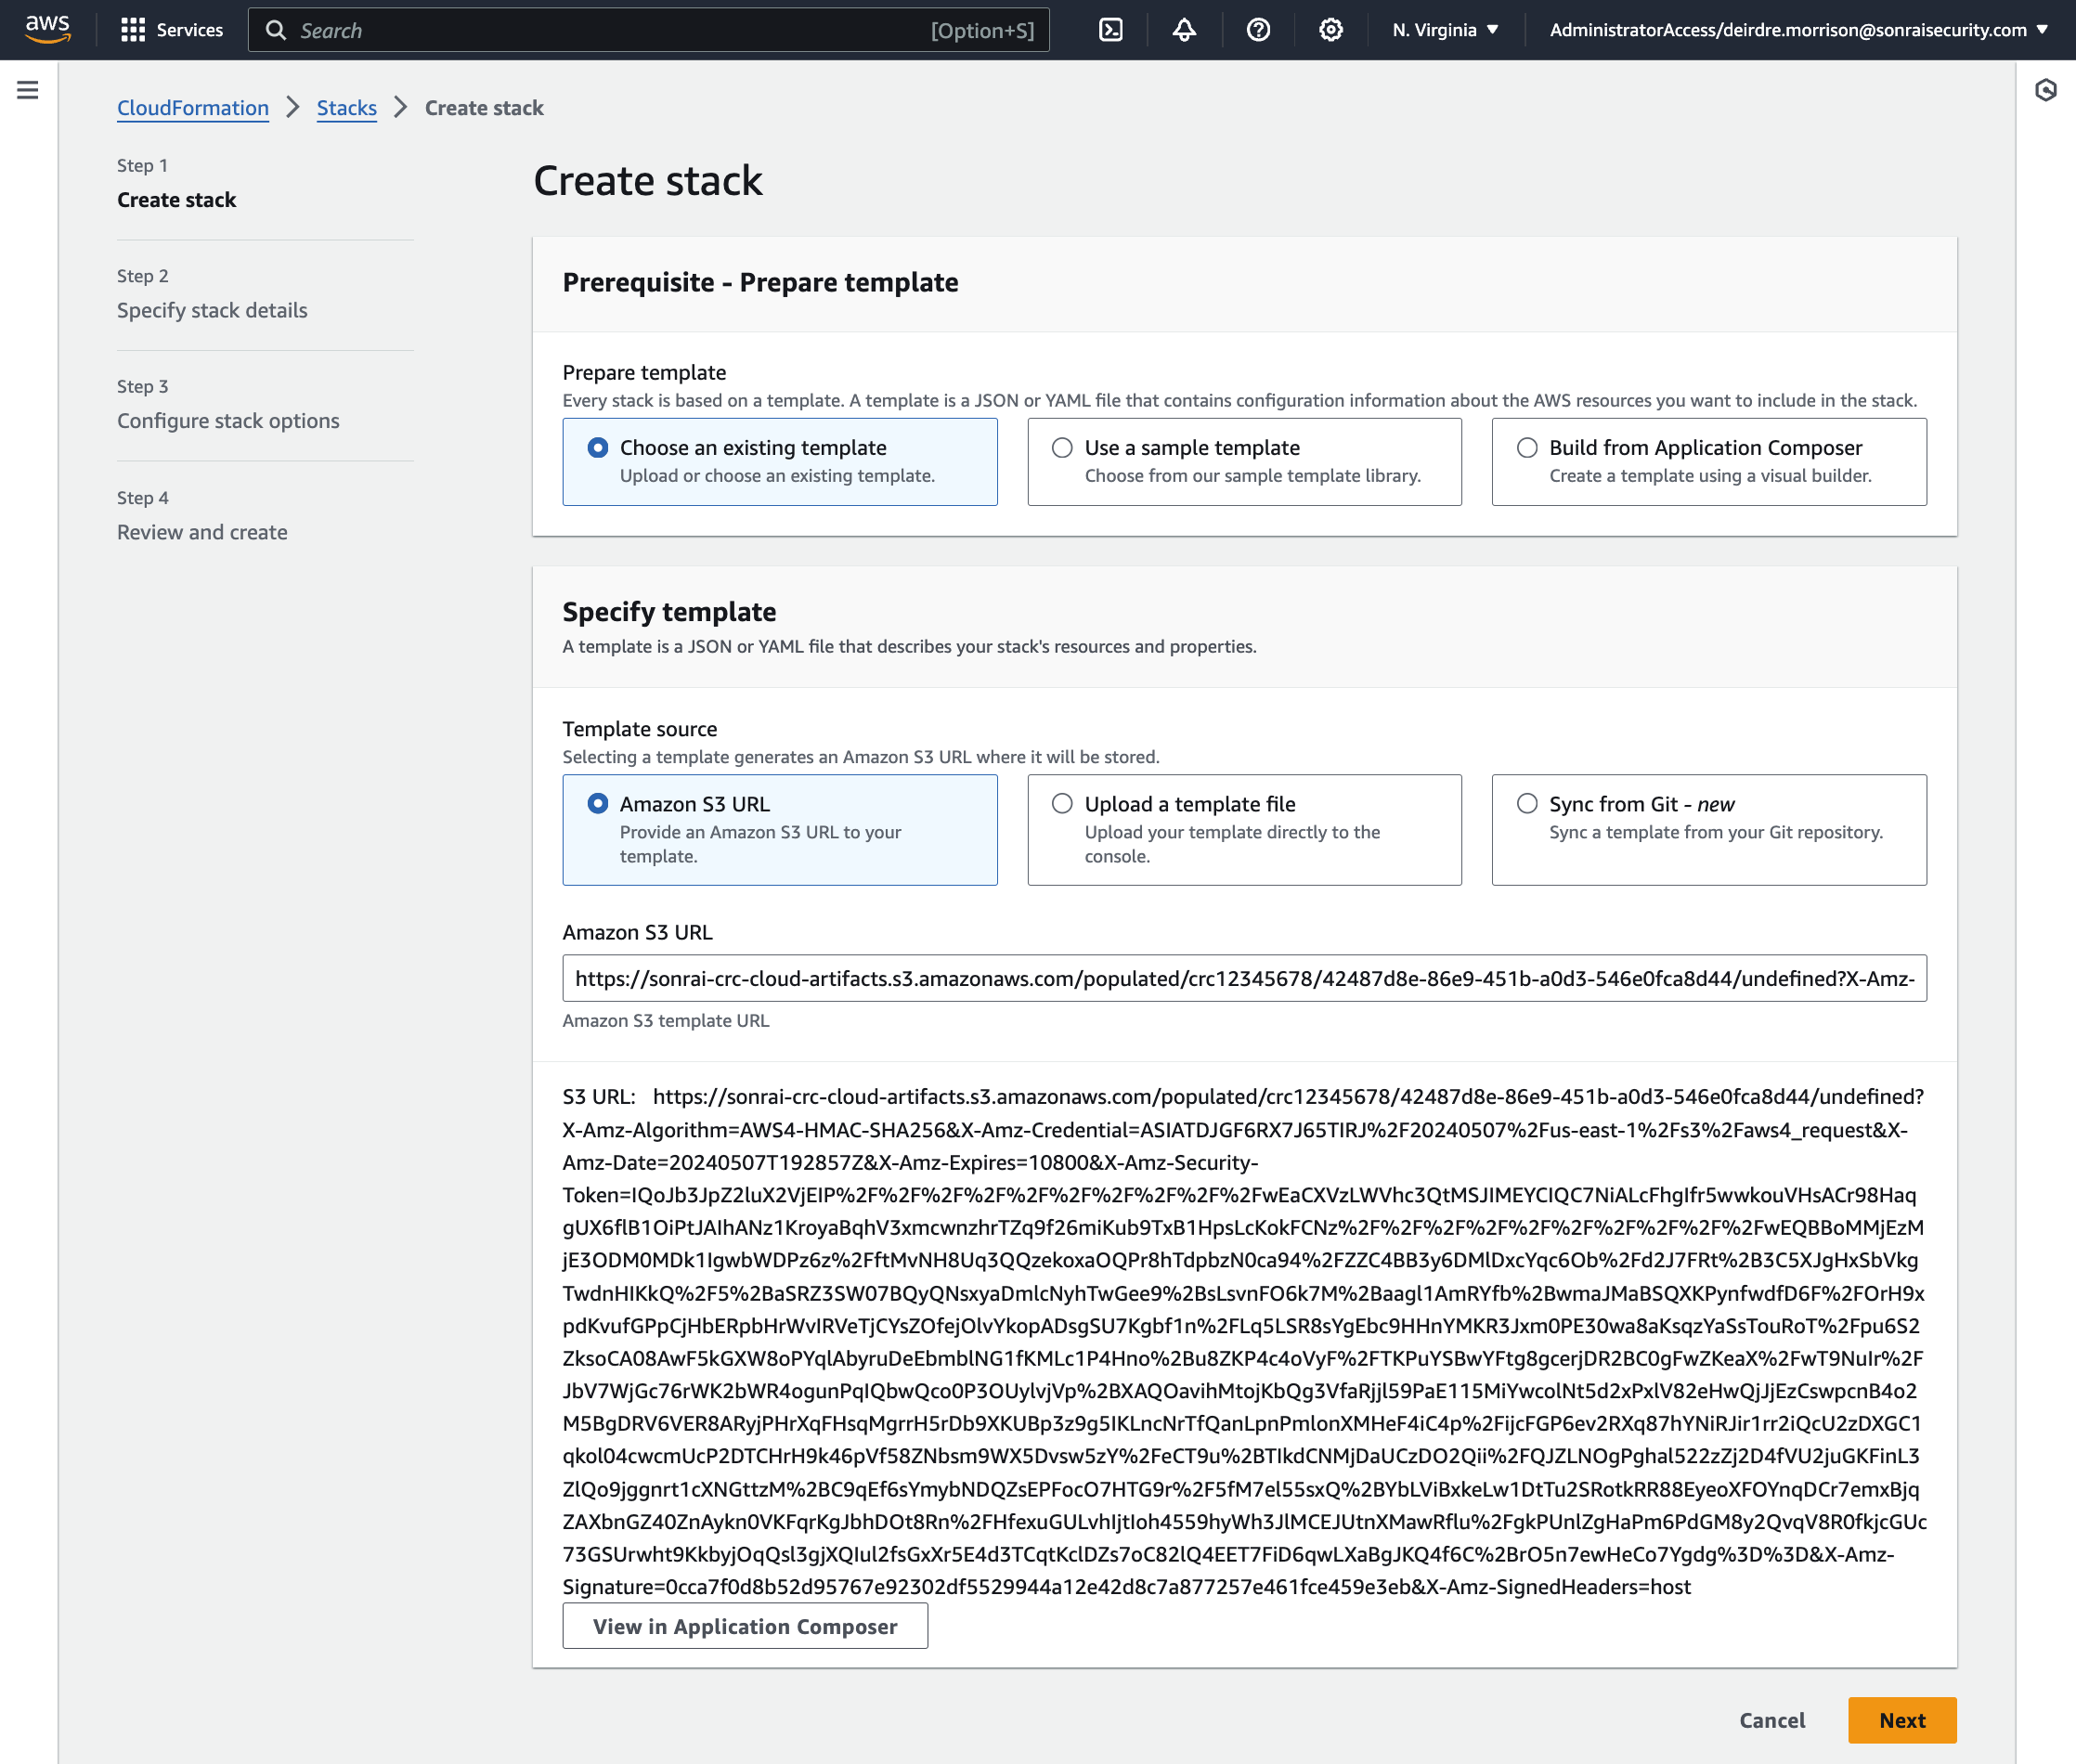
Using Sonrai's provided CloudFormation template, create the Collector role (which includes ReadOnlyAccess OR SecurityAudit (your choice!), AmazonElasticContainerRegistryPublicReadOnly, and AWSSSODirectoryReadOnly permissions)
The lesser privileged Security Audit role in the Sonrai platform uses the SecurityAudit AWS policy. These additional S3 permissions must be added to the Sonrai Collector role (where the S3 bucket exists) to enable access to CloudTrail trails and S3 server access logs:
s3:GetBucket*s3:ListBucket*s3:GetObject
If you have an encrypted Organizational S3 bucket, see below for relevant additional instructions on providing Sonrai the capability to read those bucket contents for proper data ingestion!
a) ReadOnlyAccess + Server-side encryption (SSE) in use (no further action required)
b) ReadOnlyAccess policy + Customer Managed Key (CMK) in use (additional steps are required)
c) SecurityAuditor policy in use (additional steps are required)
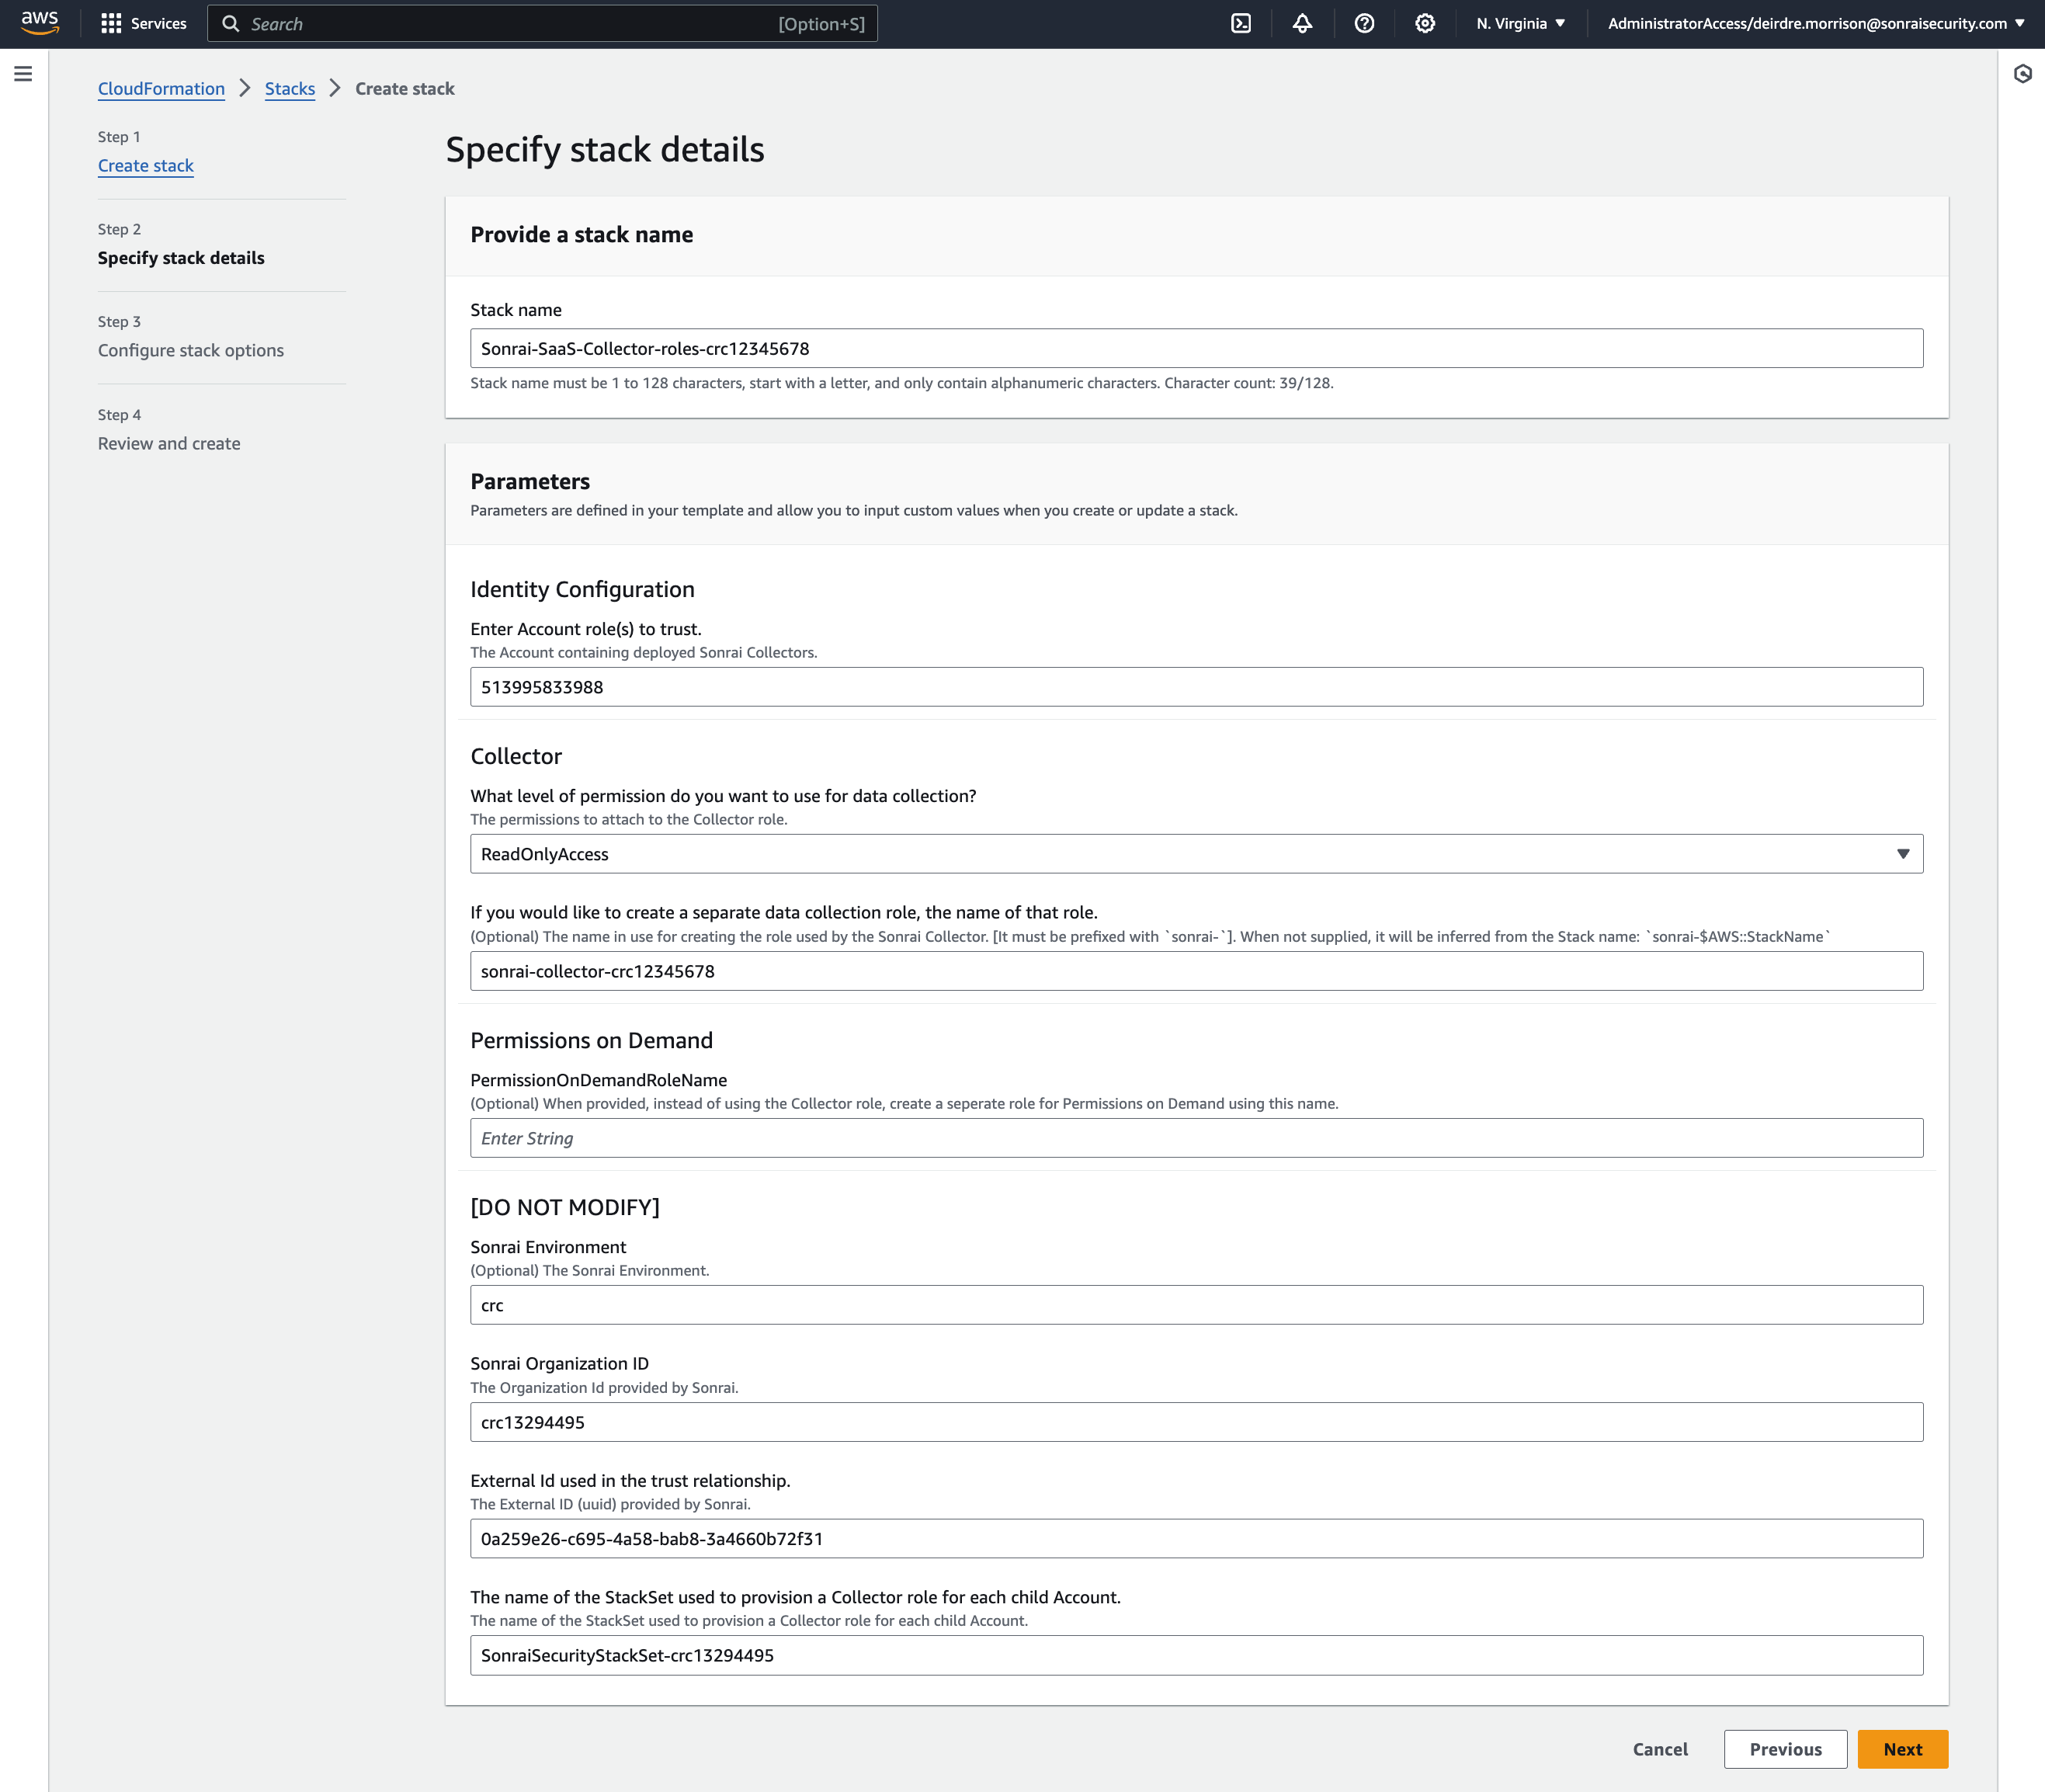
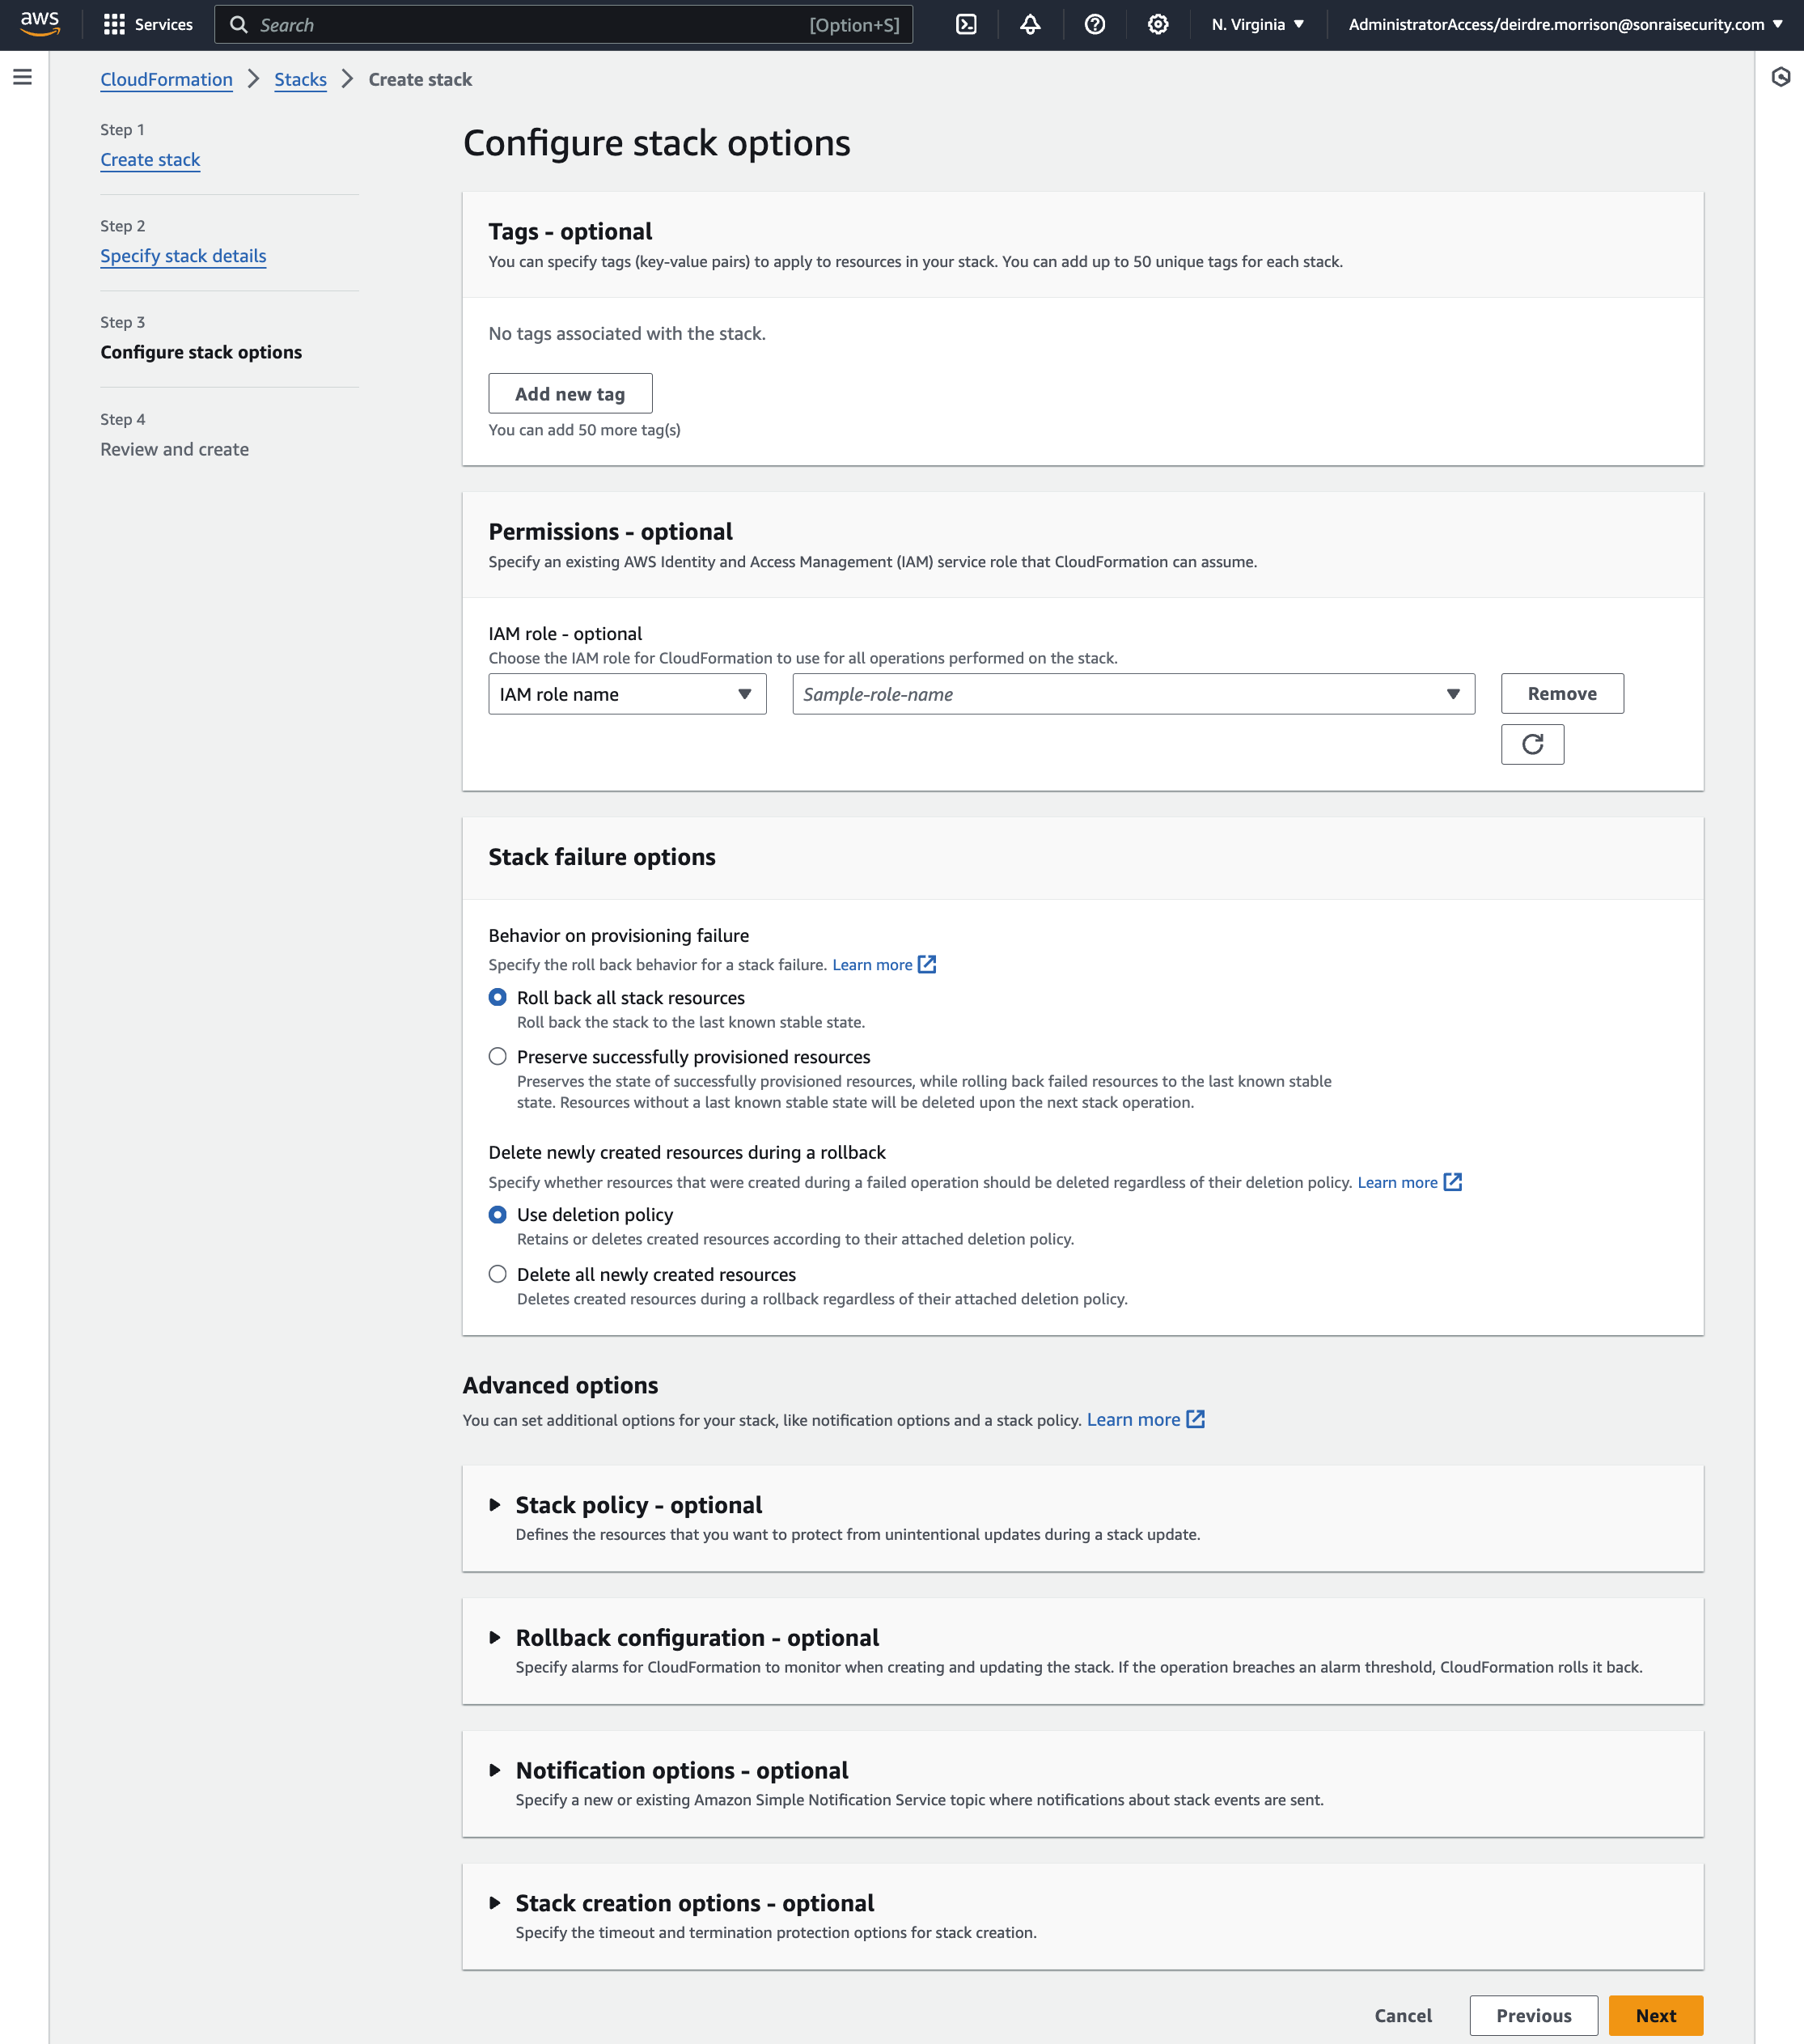
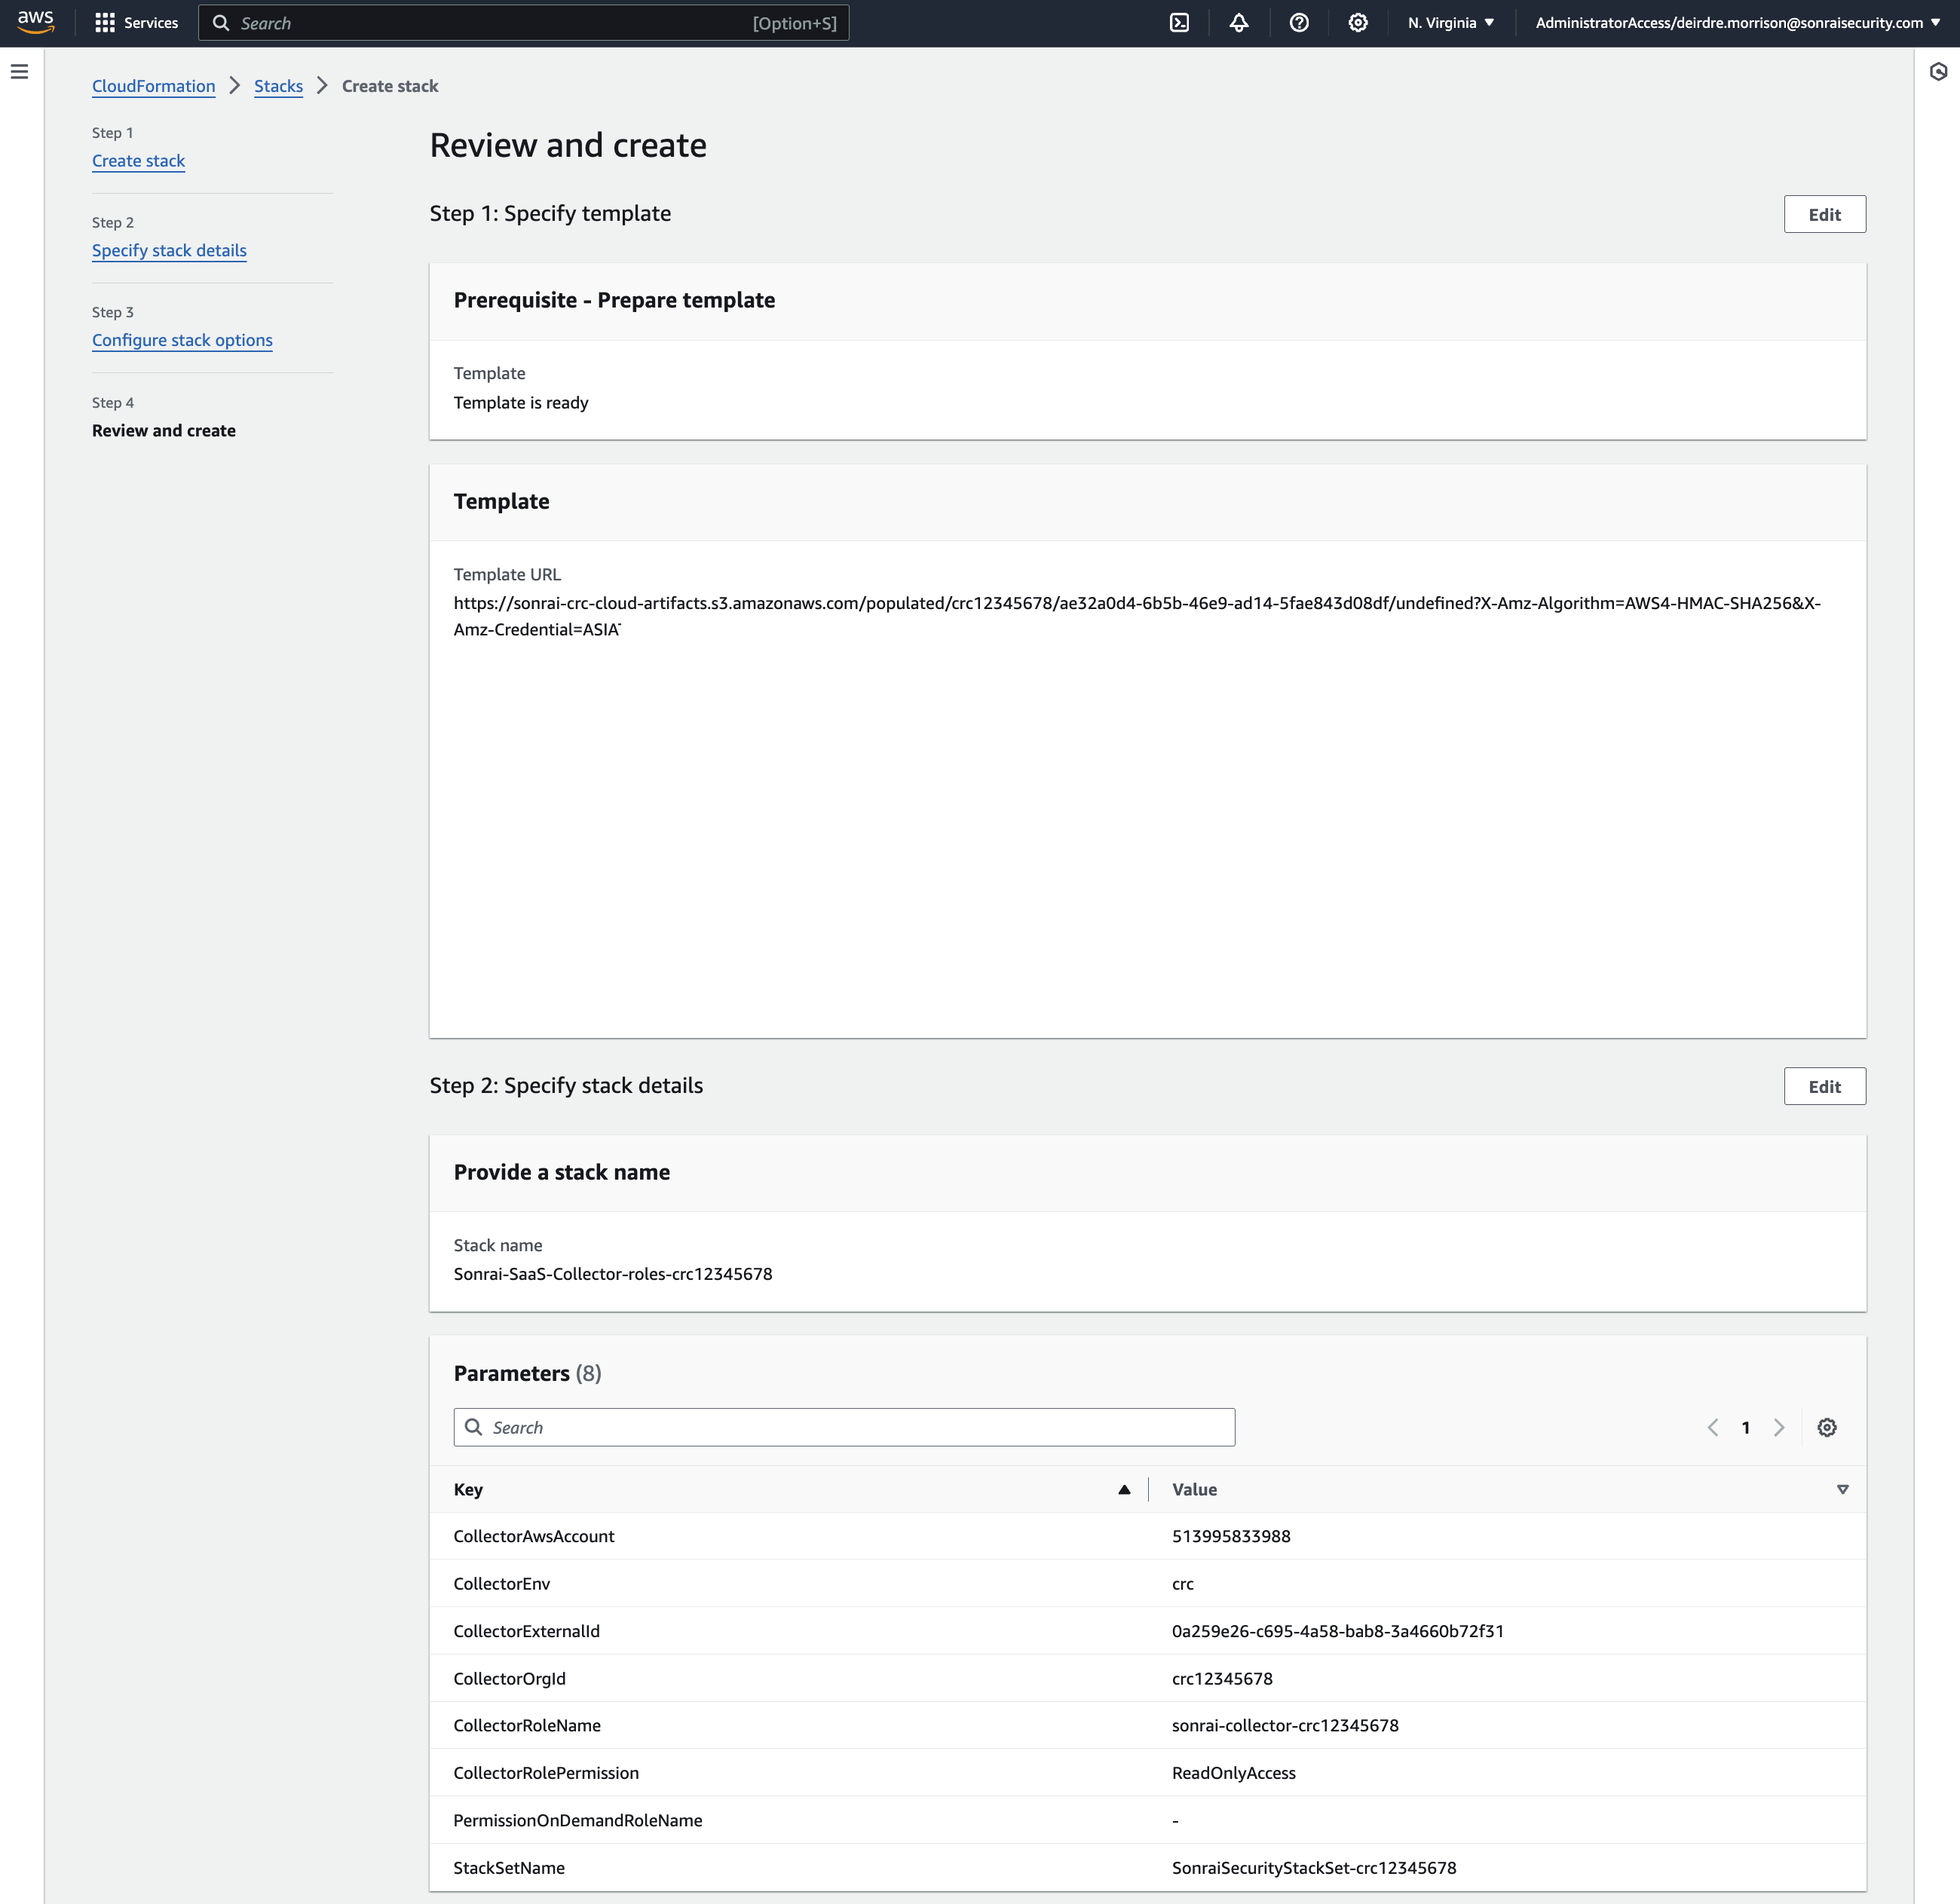
The CloudFormation template configures:
- Sonrai's provided trust policy
SonraiSecurityStackSetcreation to deploy to all the nested child Accounts
(*The StackSet is not deployed in this step, simply created)
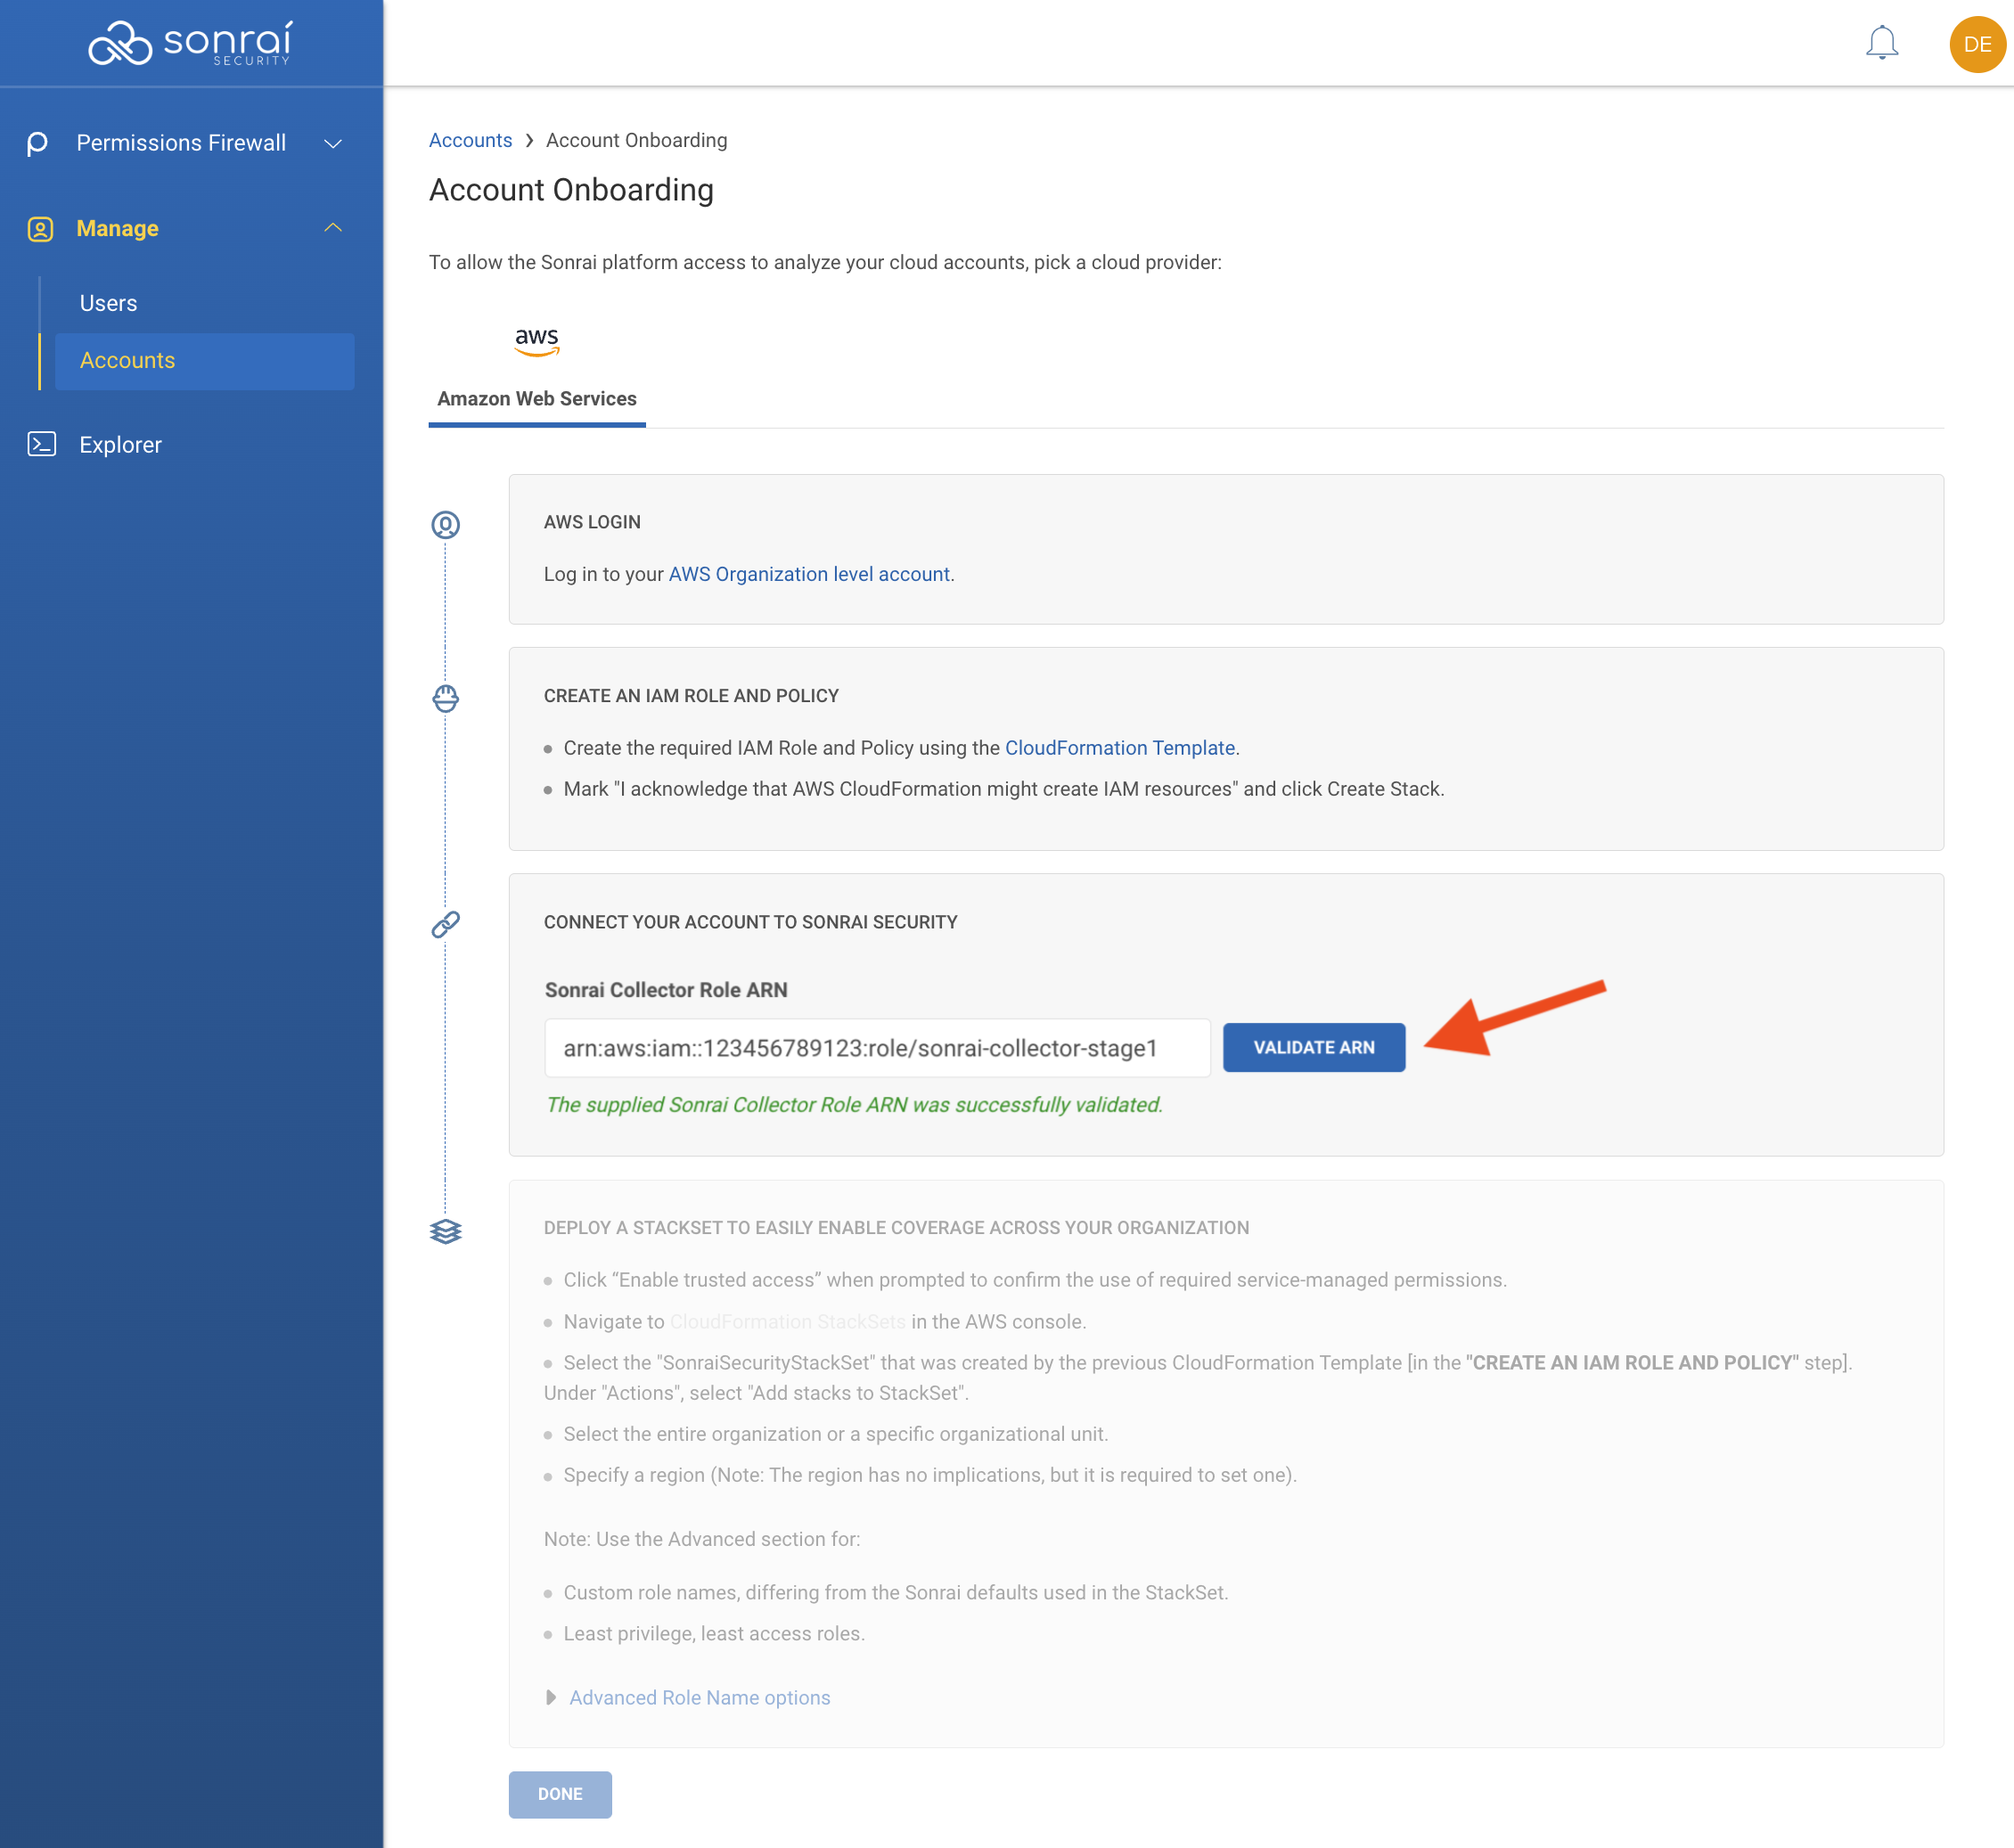
Add the Sonrai Collector role ARN in the Sonrai platform & click to validate the ARN
*You may be required to click "Enable trusted access" to continue
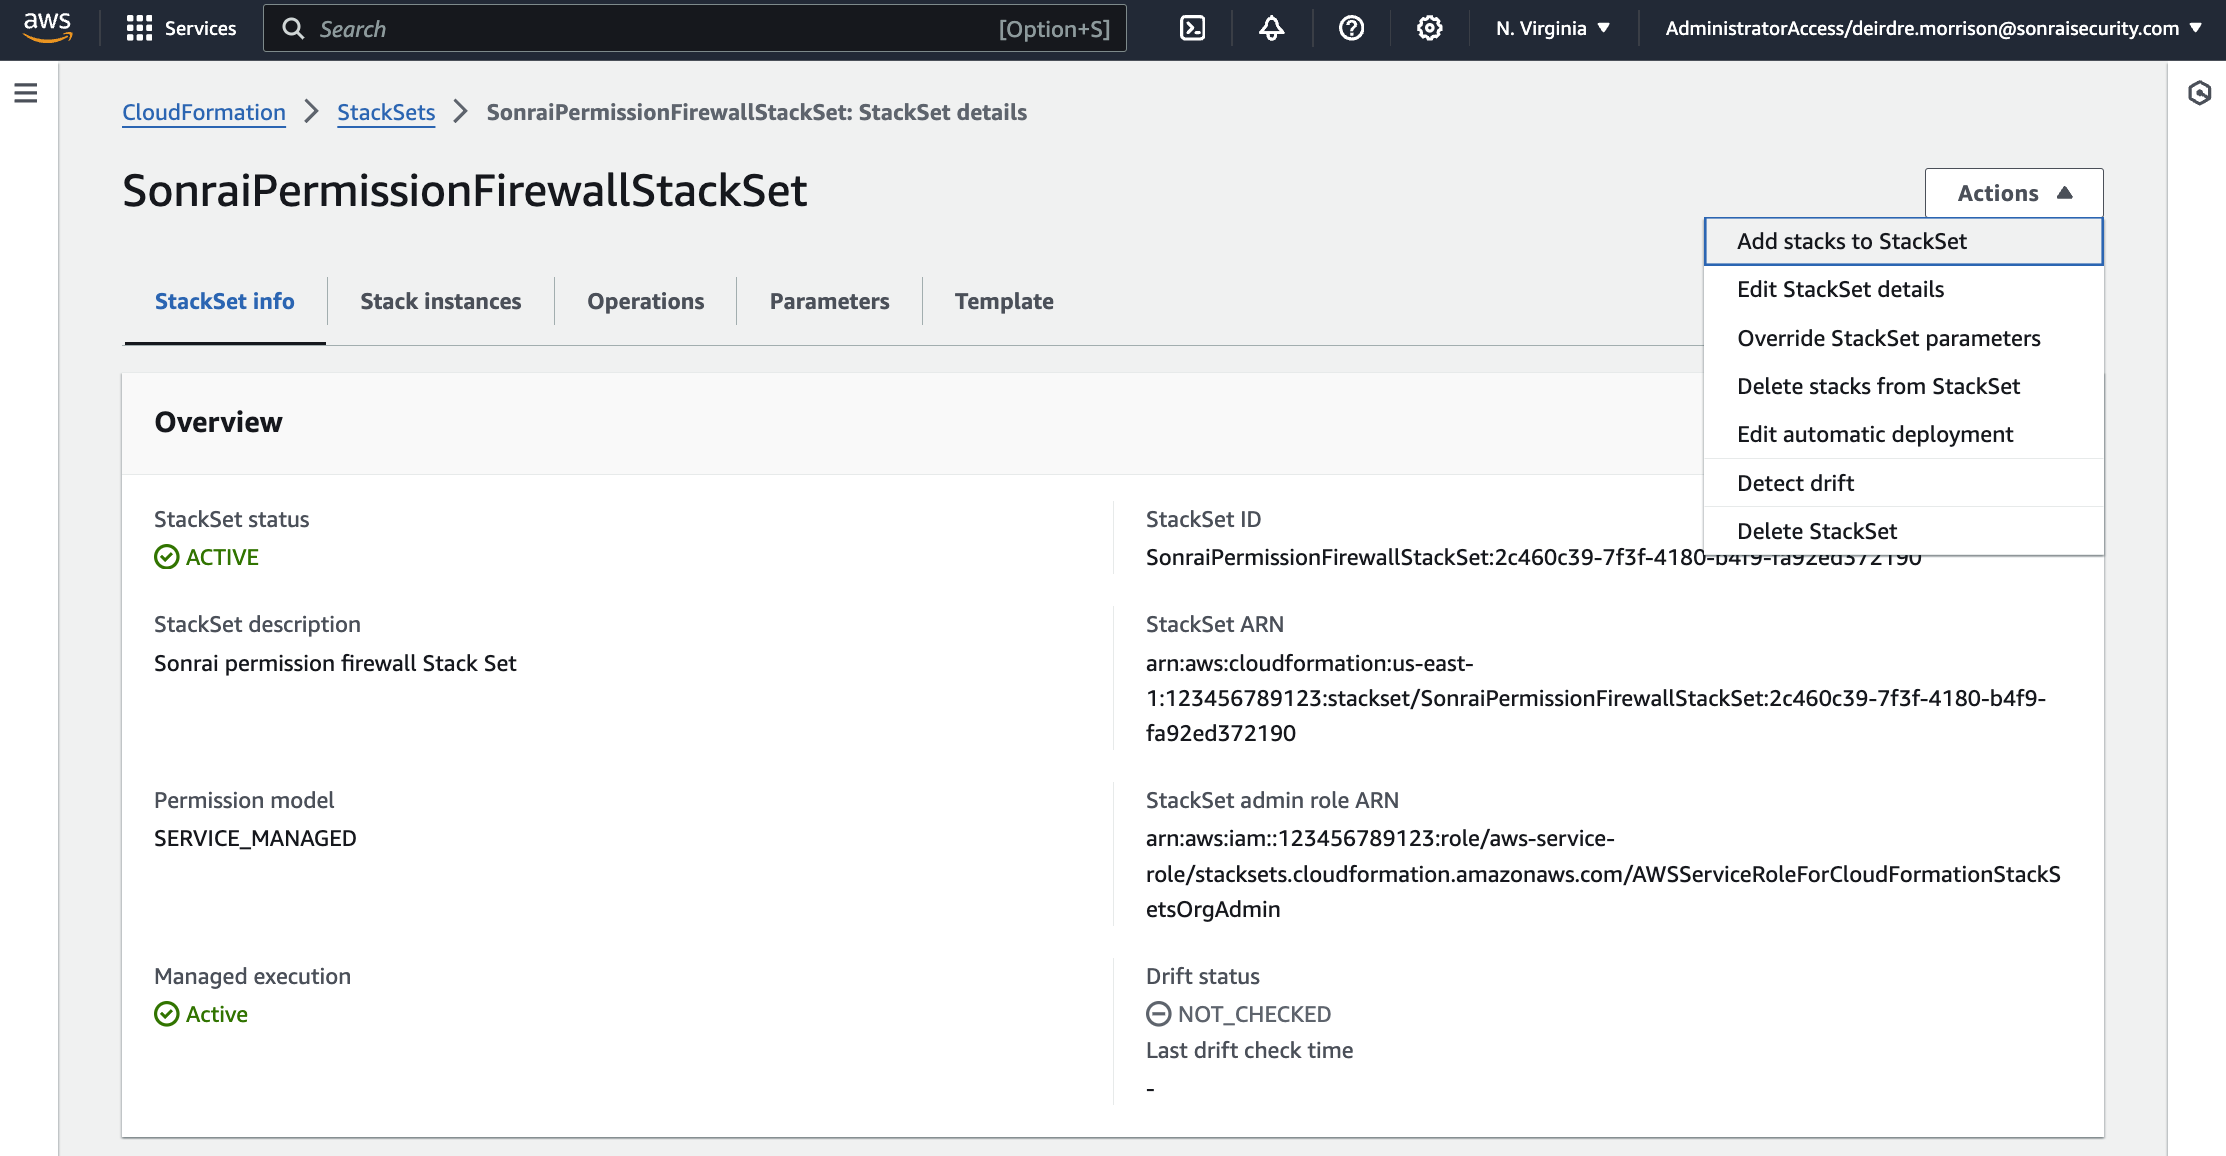
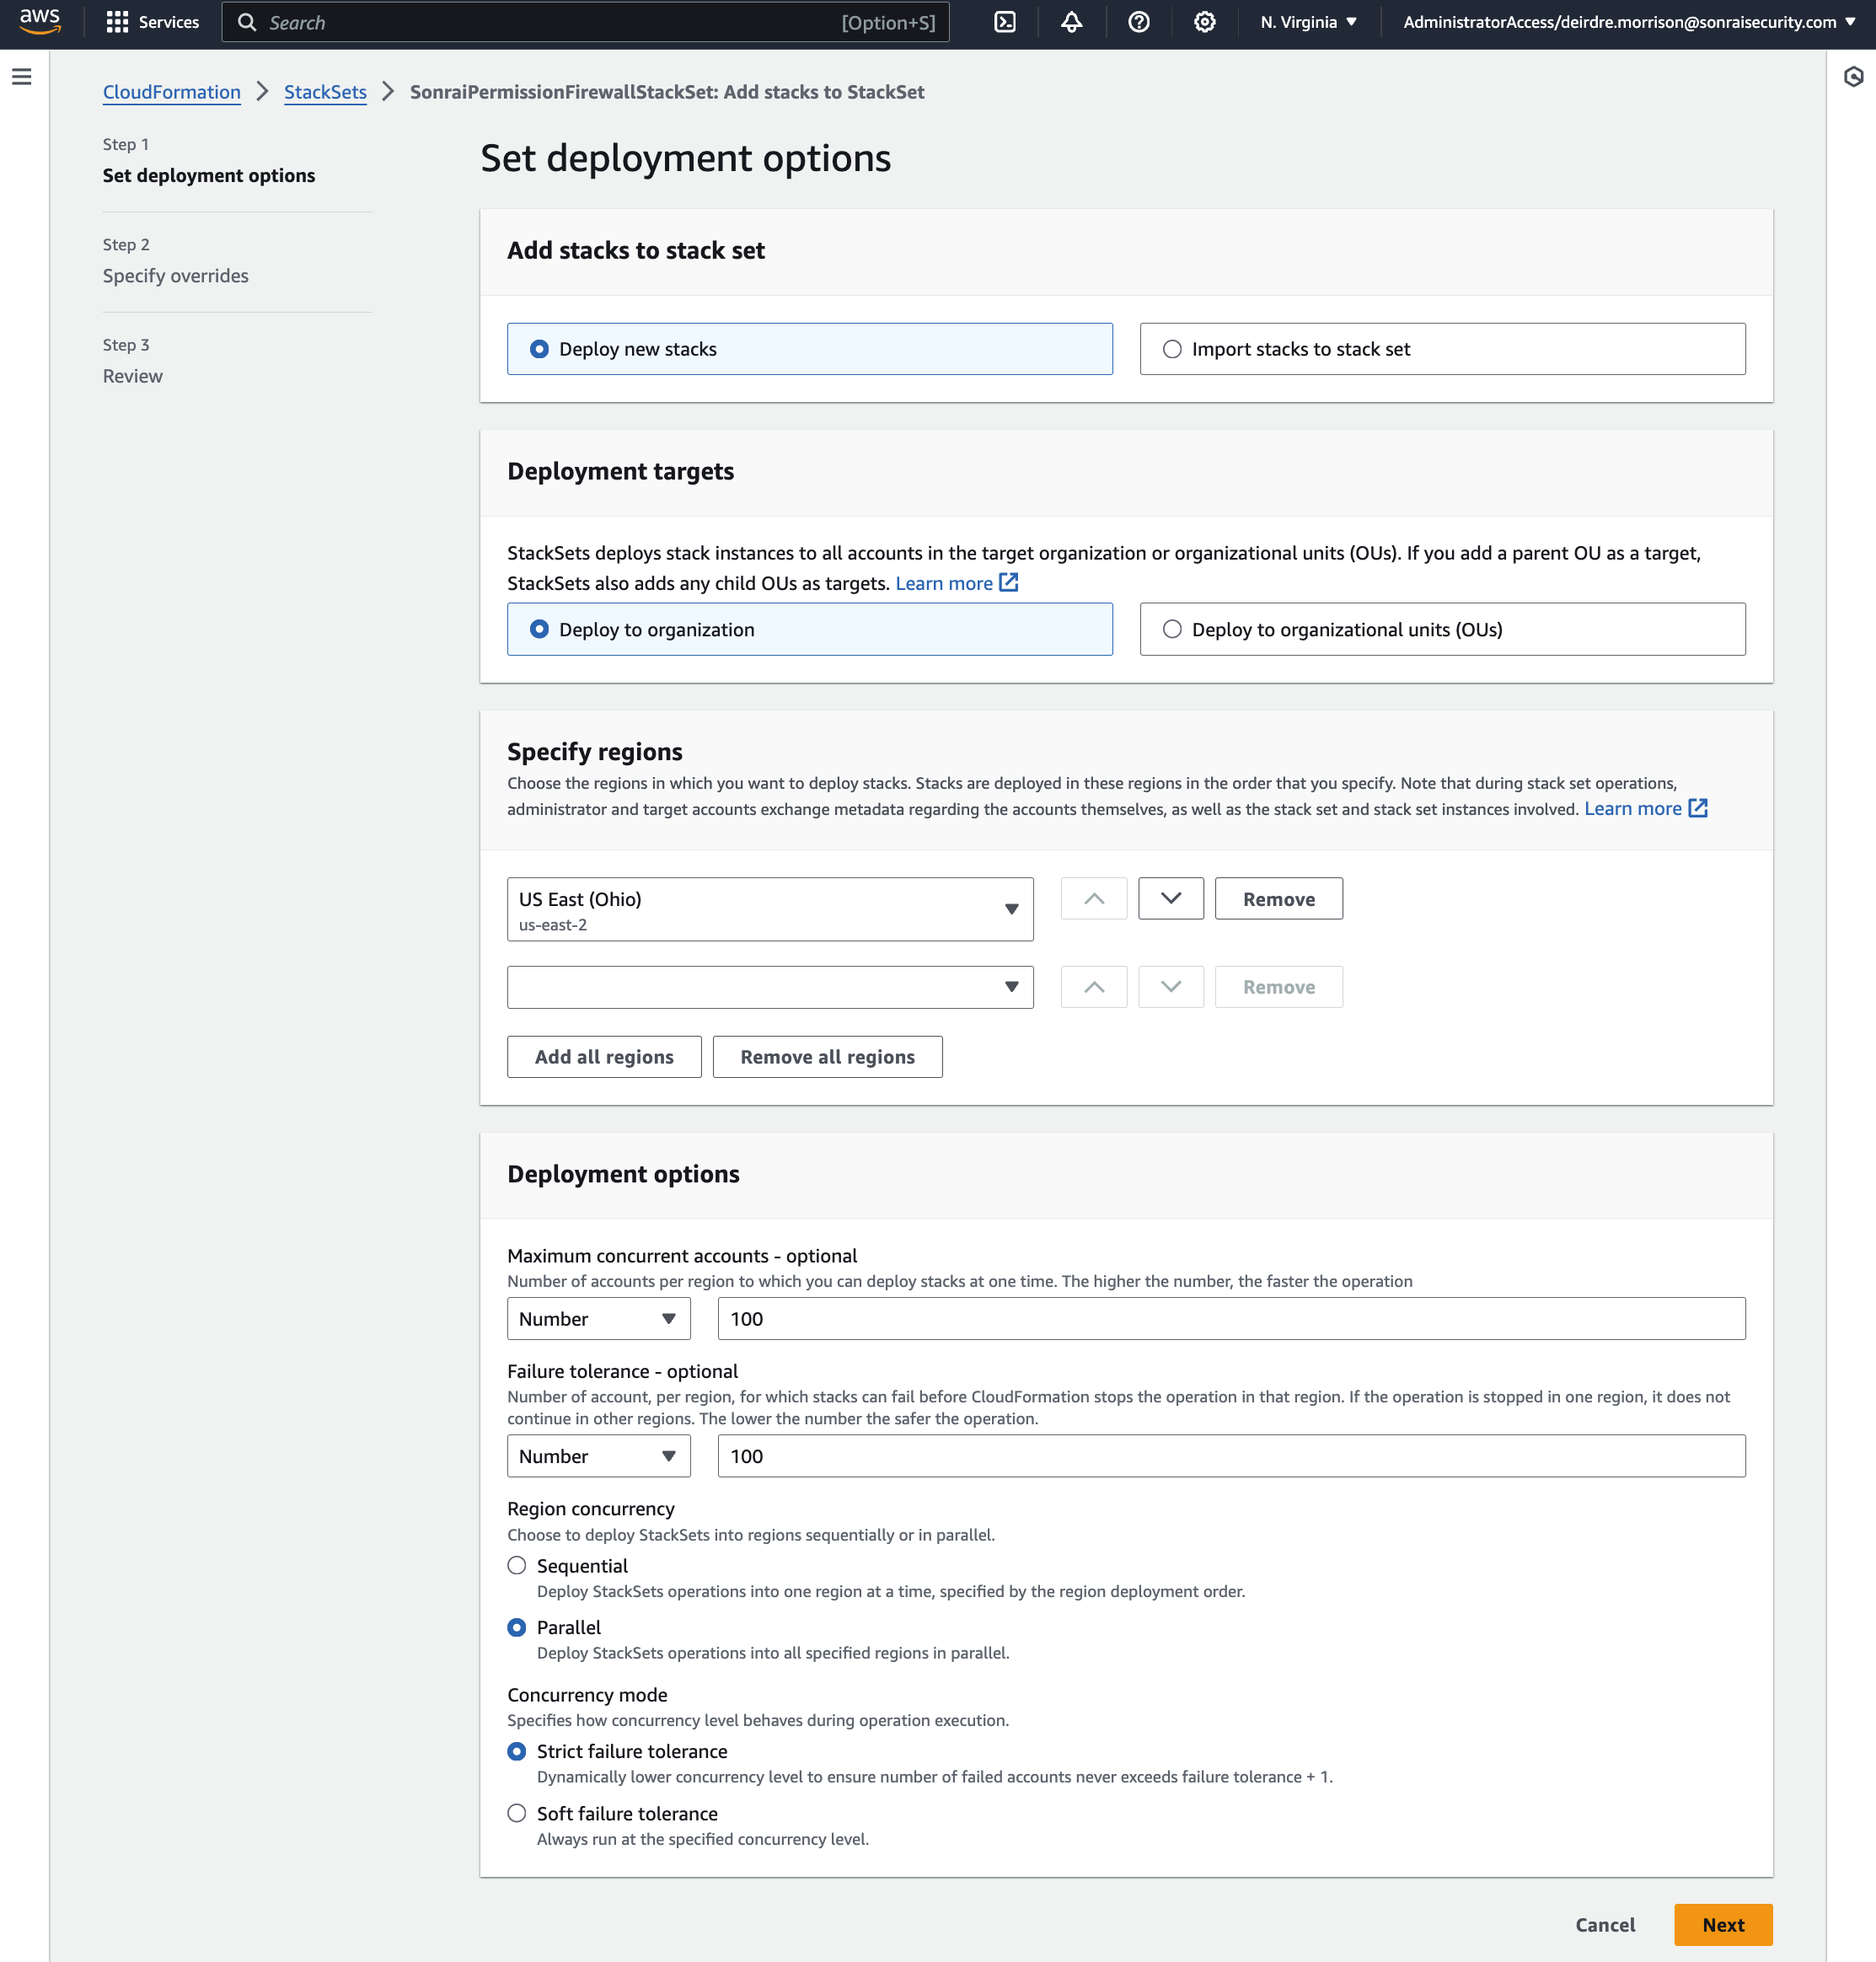
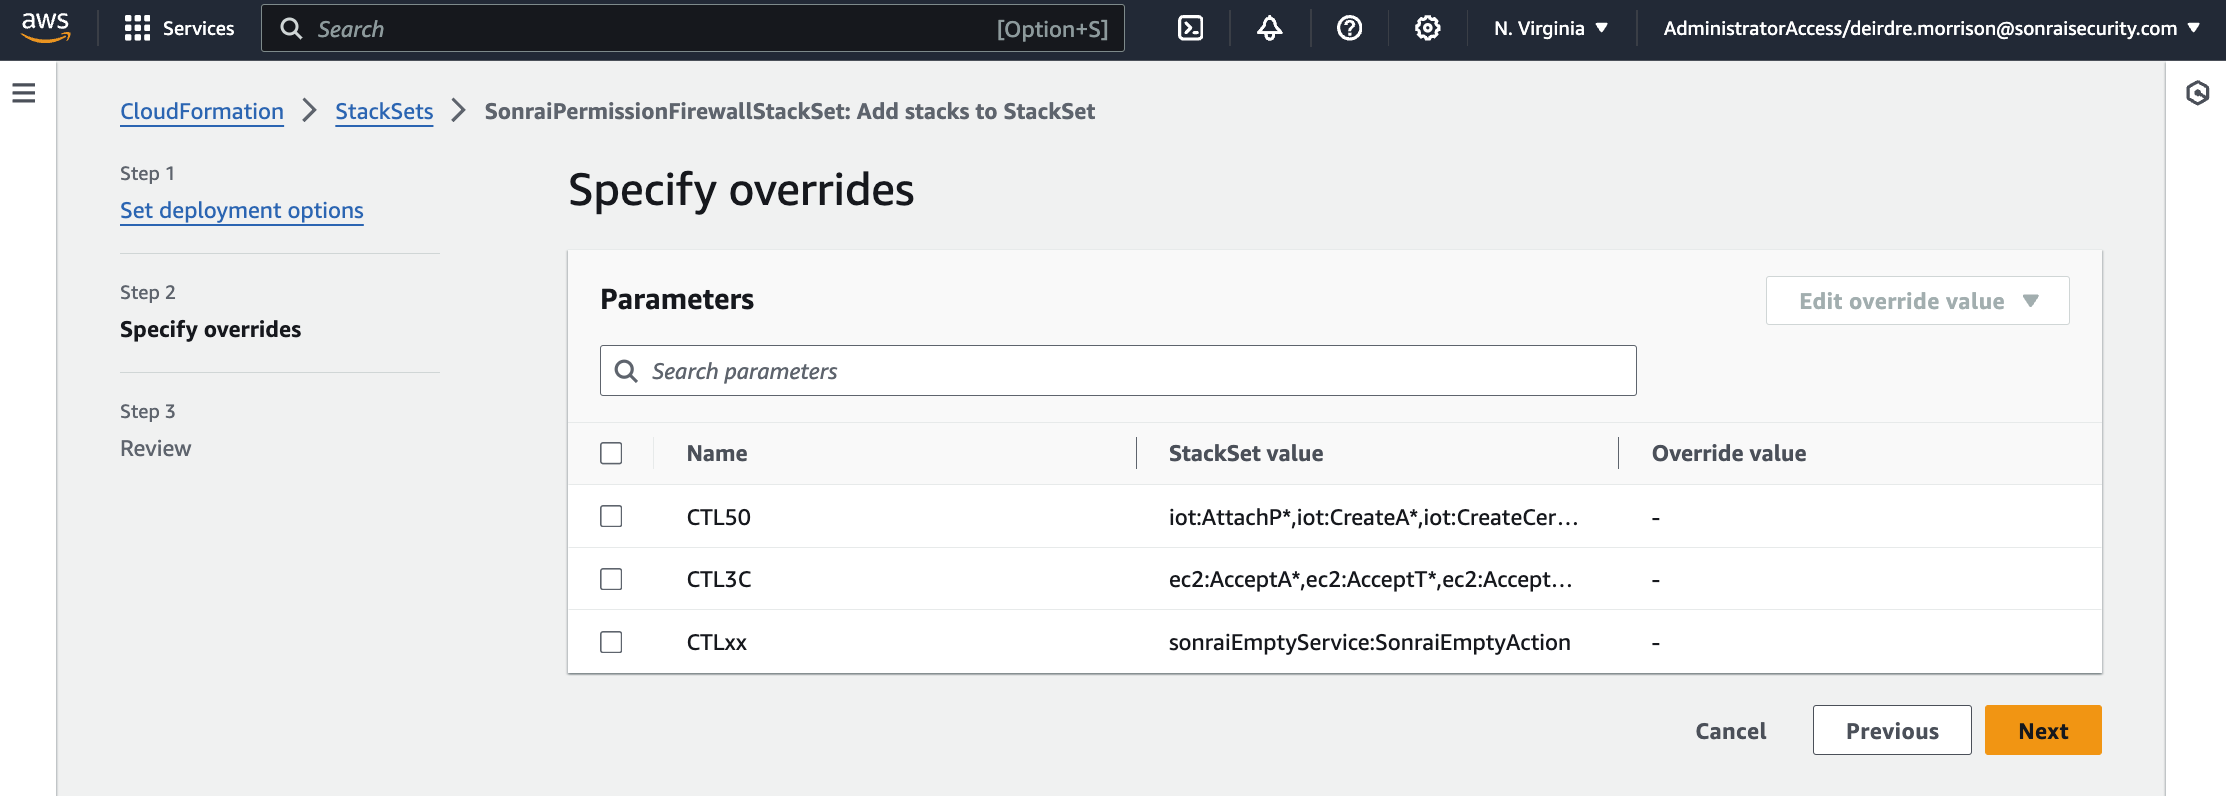
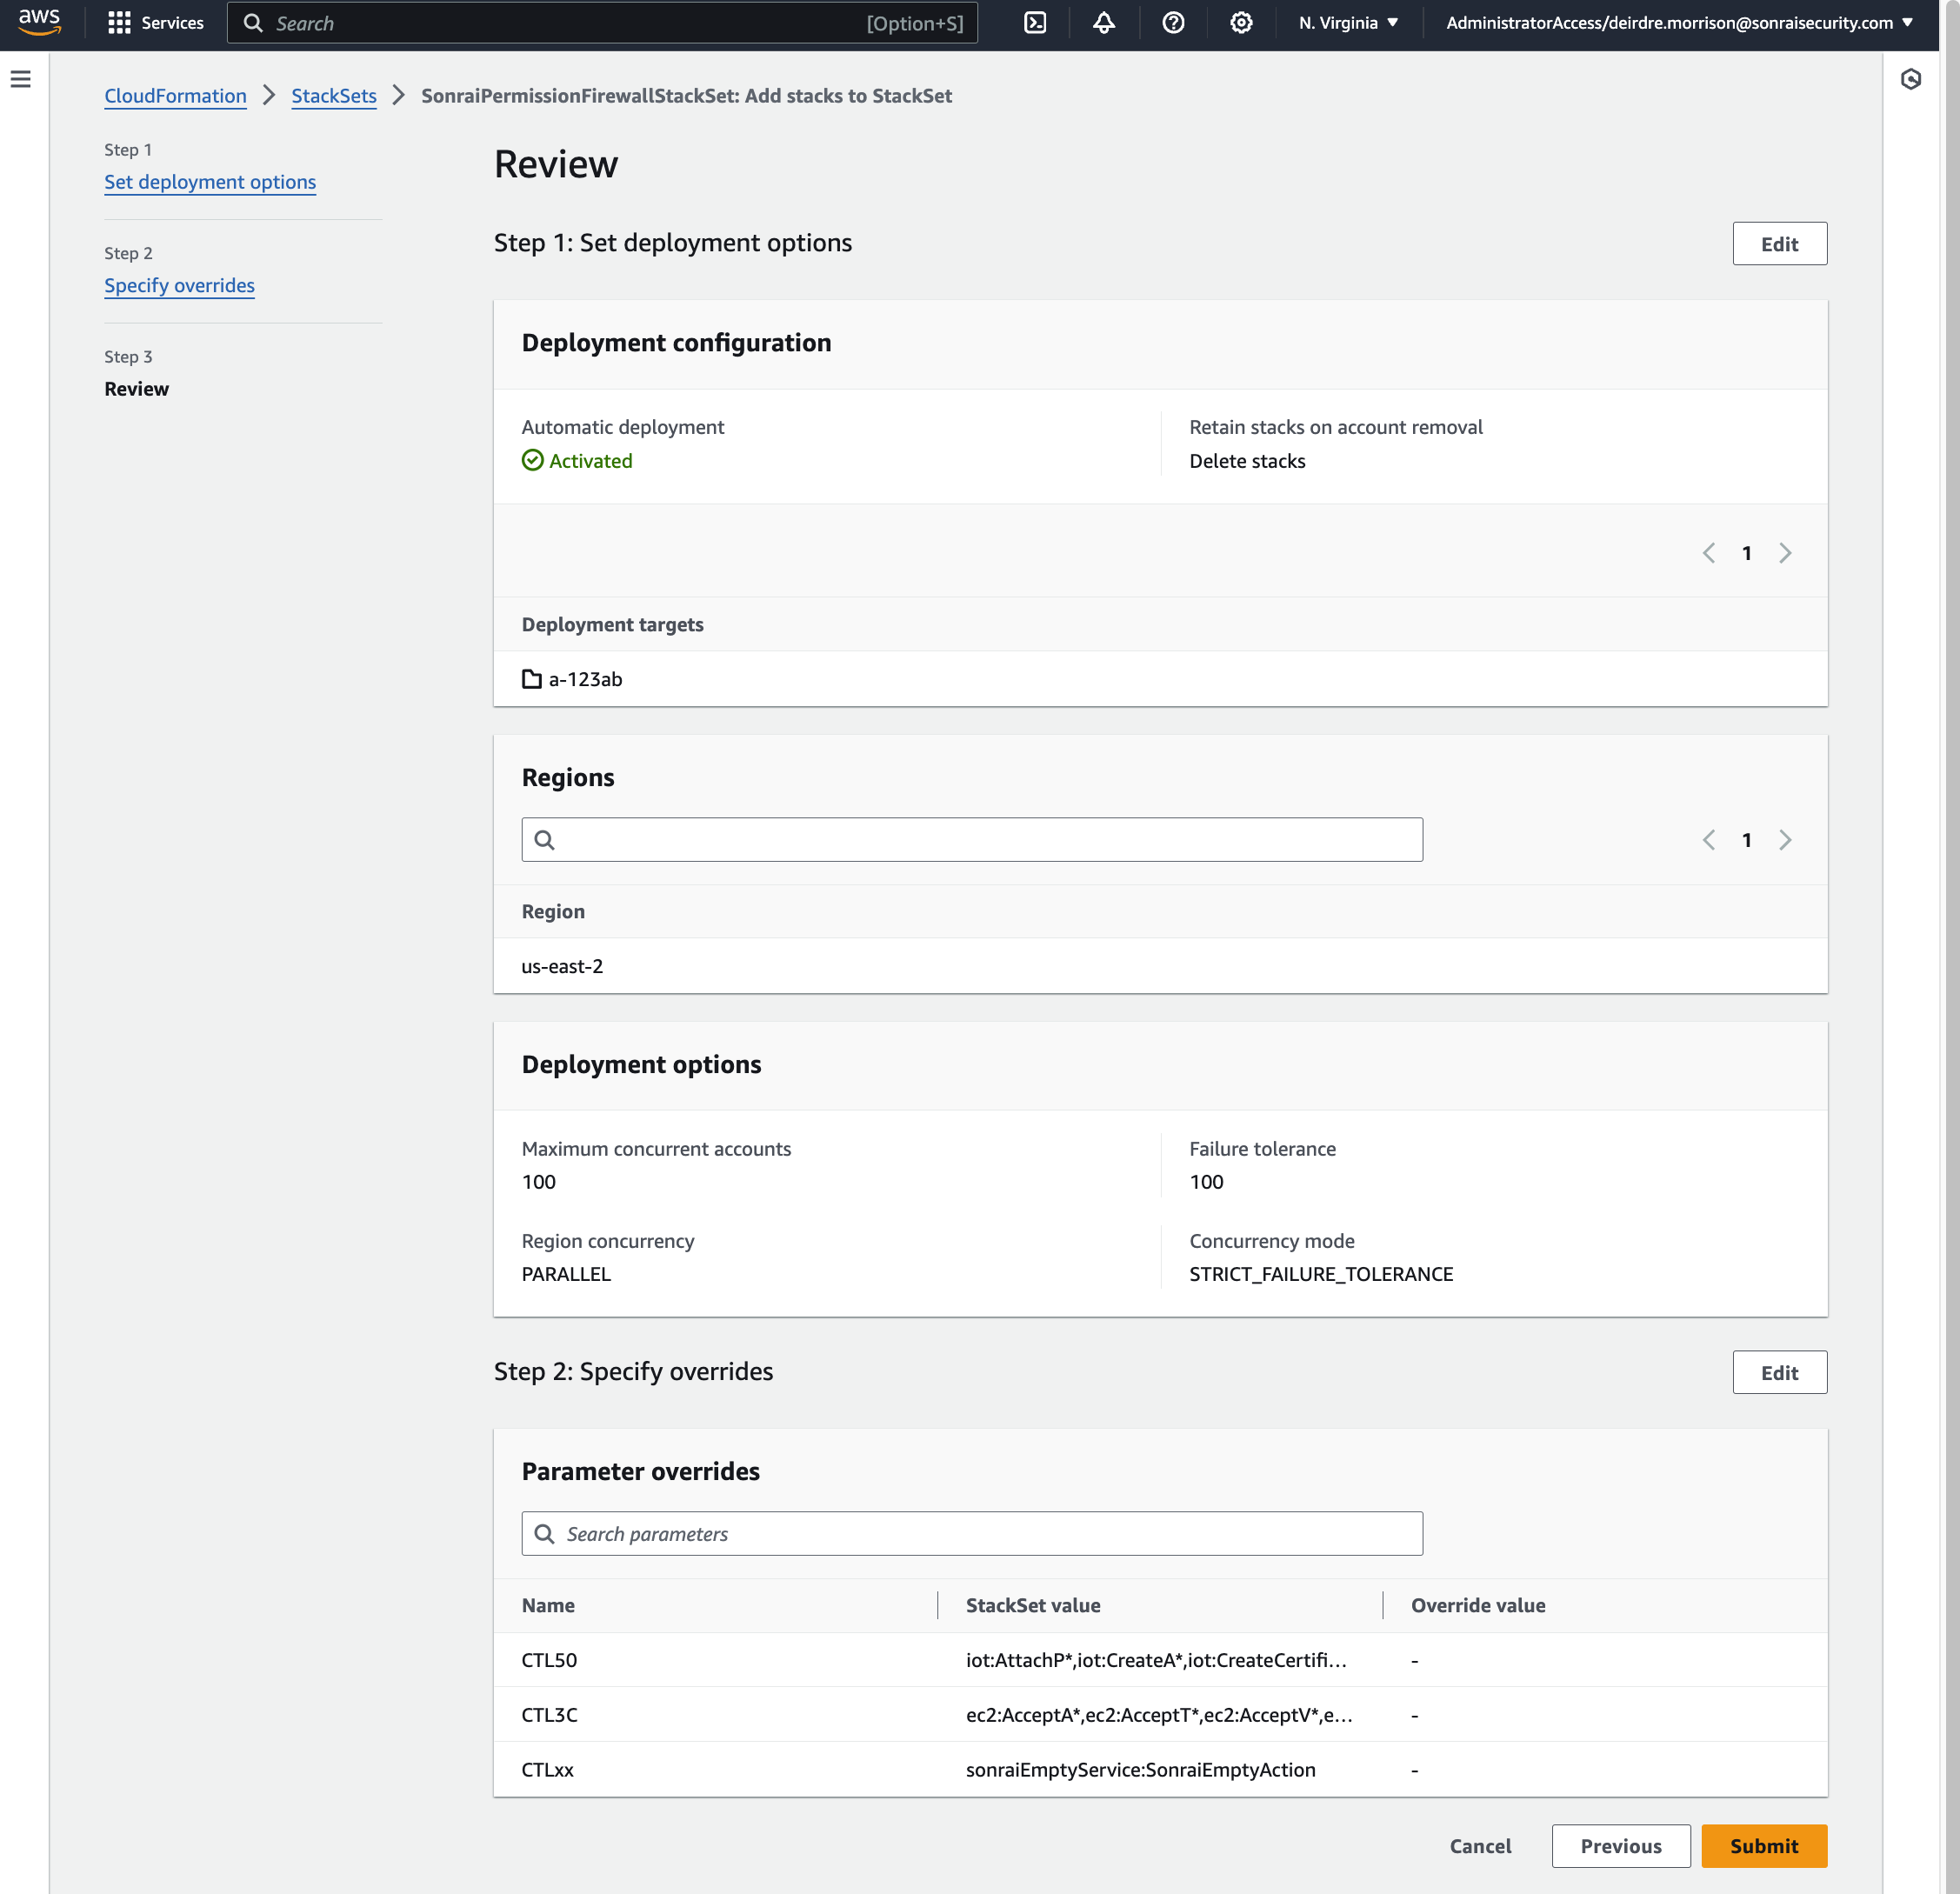
In AWS, deploy the SonraiSecurityStackset as directed in the Sonrai UI onboarding wizard (see photos within the expansion pane for configuration details)
In the Sonrai UI, once all above actions are completed, click "Done" to finish the onboarding wizard
Post-Deployment
The Discovery process can take anywhere from 10 minutes to ~24 hours to complete, depending on the size of the cloud accounts and the number of accounts added. As information is collected and processed by Sonrai, the Services page will begin to populate entries.
While you wait for cloud ingestion to complete, take a look at how the Cloud Permissions Firewall works: